Pi Based Picture Frame
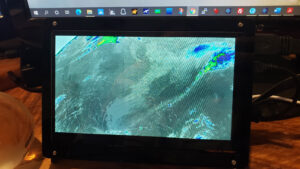
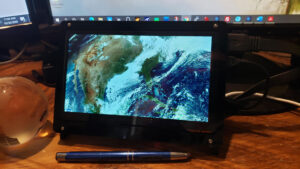
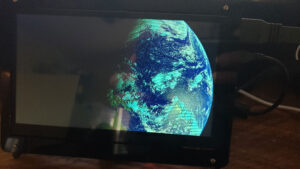
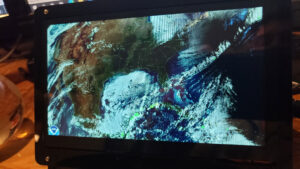
Example of the frame showing the “Ken Burns” Style moving image
So I decided on a new project, I get all these cool images from GOES and other NOAA sats, but the only time I really look at them is when I am in front of my PC. I thought, “wouldn’t it be nice to see them any time, in a frame, just hanging there on a wall?” So I built a digital picture frame, using an extra PI I had, an HDMI display (any HDMI monitor will work, and some python scripting and some free software. I am not the first to do this by any means, but I took it a step further and used a more complex display software that allows “Ken Burns” style panning of images, fades, and transitions, can be controlled with Alexa or Google Voice can crop in an say a continent or region like Australia or closer to home, the Great Lakes and much more.
If you like what I do please support me on Ko-fi, It really means a lot, every bit helps!
First I was lucky that someone shared their modified script for downloading imagery from NOAA sites, which made it relatively easy to just grab those and my own images. I modified several of the scripts and now display imagery from GOES16 and 17, Himawari 8, NOAA 20, and others.
Later I’ll make a nice wooden frame for this!
Required parts and pieces
- Old TFT or HDMI Monitor/ LCD screen
- HDMI-to-DVI cable (IF the TFT screen supports DVI)
- HDMI to HDMI Cable OR HDMI to Micro HDMI
- Raspberry Pi 2,3, 0r 4
- Micro SD card
- Raspberry Pi power supply
- Keyboard
- Mouse (optional)
Required Scripts
Heres is a zip file containing the python scripts for downloading imagery.
Down load that file and save it, we’ll be using it later.
Download and flash Raspbian to the Micro SD card by following these directions. You will need the GUI desktop version of the Raspberry PI OS. Setup the wpa-config and also configure the PI for SSH access. Plug the Micro SD card into the Raspberry Pi, boot it up, and configure your WiFi. My first action after a new Raspbian installation is usually running sudo raspi-config. Change the hostname (e.g., to picframe) in Network Options and enable SSH to work remotely on the Raspberry Pi in Interfacing Options. Connect to the Raspberry Pi using (for example) ssh.
Stop the screen from going blank
By default, the screen will go blank when there is no keyboard or mouse movement detected. Since this is a picture frame with no mouse or keyboard, all commands will be entered via SSH even though we are using the full graphical version of Raspberry Pi OS
So let’s disable the automatic screen saver.
In Terminal enter
sudo nano /etc/xdg/lxsession/LXDE-pi/autostart
After the editor opens, change the content to this:
@lxpanel --profile LXDE-pi
@pcmanfm --desktop --profile LXDE-pi
@xset s off
@xset -dpms
@xset s noblank
Hit CTRL + O to write the file to disk and then CTRL + X to exit the editor.
Disable Overscan– if necessary.
If the display on your screen is not completely filled but instead shows a black border, you will need to disable Overscan.
Enter
sudo raspi-config nonint do_overscan 1
Create Folders for Script and images
Create folder on PI to hold images:
mkdir /home/pi/images
Create folder on PI to hold scripts.
mkdir /home/pi/goes
Get the Python scripts and install them
cd goes
wget https://usradioguy.com/NOAA/goes_py_scripts.zip
unzip goes_py_scripts.zip
Installing the PI3D image viewer software
NOTE: I have included the versions for Raspberry pi 2, 3, and 4 as they are different, and one command may not work for the other!
On a Raspberry Pi 2 and 3
Enter in terminal:
sudo raspi-config nonint do_boot_behaviour B4 && sudo raspi-config nonint do_memory_split 128 && sudo raspi-config
In the raspi-config module, go to 7 Advanced Options > A8 GL Driver > Choose G1 (Legacy)
Reboot and enter:
sudo pip3 install pi3d && wget https://github.com/pi3d/pi3d_demos/archive/master.zip && unzip master.zip && rm master.zip && mv pi3d_demos-master pi3d_demos
You can test the program by entering (make sure you now have a monitor connected to your Raspberry Pi):
cd /home/pi/pi3d_demos && python3 Earth.py
If you see a rotating globe, your installation has been successful. If not, check your settings.
Hit “CTRL+C” to stop the globe.
On a Raspberry Pi 4
Enter in terminal:
sudo raspi-config nonint do_boot_behaviour B2 && sudo raspi-config nonint do_memory_split 256 && sudo raspi-config
NOT NECESSARY IN NEW VERSION In the raspi-config module, go to 7 Advanced Options > A8 GL Driver > Choose G2 GL Fake KMS.
Reboot and enter:
sudo pip3 install pi3d && wget https://github.com/pi3d/pi3d_demos/archive/master.zip && unzip master.zip && rm master.zip && mv pi3d_demos-master pi3d_demos
You can test the program by entering (make sure you now have a monitor connected to your Raspberry Pi):
cd /home/pi/pi3d_demos && sudo xinit /usr/bin/python3 /home/pi/pi3d_demos/Earth.py :0 -- -s off -dpms -s noblank
If you see a rotating globe, your installation has been successful. If not, check your settings.
Hit “CTRL+C” to stop the globe.
Autostarting the Pi3D image viewer at boot
Next, we want to make sure that your photos start automatically when you turn on your Raspberry Pi.
We will use the systemd services to manage the Pi3D script at boot. There is again a slight variation for the Raspberry models.
For the Raspberry Pi 2 and 3
Create a new service file
sudo nano /etc/systemd/system/pi3donpi3.service
and paste the following text into the file:
[Unit]
Description=Pi3D on Pi3
After=multi-user.target
[Service]
Type=idle
User=pi
ExecStart=/usr/bin/python3 /home/pi/pi3d_demos/PictureFrame2020.py
Restart=always
[Install]
WantedBy=multi-user.target
Save with CTRL+O and close with CTRL+X.
Now, change the file permissions to make it readable by all by typing
sudo chmod 644 /etc/systemd/system/pi3donpi3.service
As the last step, you need to tell the system that you have added this file and want to enable this service so that it starts at boot.
sudo systemctl daemon-reload
sudo systemctl enable pi3donpi3.service
Reboot your Pi, and you are ready to start configuring the PictureFrame2020.py file.
For the Raspberry Pi 4
Create a new service filesudo nano /etc/systemd/system/pi3donpi4.service
and paste the following text into the file:
[Unit]
Description=Pi3D on Pi4
After=multi-user.target

[Service]
Type=idle

User=root
ExecStart=xinit /usr/bin/python3 /home/pi/pi3d_demos/PictureFrame2020.py -- -s off -dpms -s noblank

Restart=always
[Install]

WantedBy=multi-user.target
Save with CTRL+O and close with CTRL+X.
Now, Change the file permissions to make it readable by all by typing
sudo chmod 644 /etc/systemd/system/pi3donpi4.service
As the last step, you need to tell the system that you have added this file and want to enable this service so that it starts at boot.
sudo systemctl daemon-reload
sudo systemctl enable pi3donpi4.service
Reboot your Pi, and you are ready to start configuring the PictureFrame2020.py file.
Configure a power-on schedule (OPTIONAL)
You can schedule your picture frame to turn on and off at specific times by using two simple cronjobs. For example, say you want it to turn on automatically at 7 am and turn off at 11 pm. Run crontab -e and insert the following two lines.
0 23 * * * /opt/vc/bin/tvservice -o
0 7 * * * /opt/vc/bin/tvservice -p && sudo systemctl restart display-manager
Note that this won’t turn the Raspberry Pi power’s on and off; it will just turn off HDMI, which will turn the screen off. The first line will power off HDMI at 11 pm. The second line will bring the display back up and restart the display manager at 7 am.
Configuring the PictureFrame2020.py
The script that controls the display of your images is PictureFrame2020.py. It is a Python script which you will find in the pi3d_demos folder. PictureFrame2020.py has a separate config file called PictureFrame2020config.py.
PictureFrame2020.py is controlled either through PictureFrame2020config.py where all the configuration settings are made permanently, or through command line arguments. Since the frame runs autonomously we will be editing the PictureFrame2020config.py file.
Open PictureFrame2020config.py in an editor.
sudo nano /home/pi/pi3d_demos/PictureFrame2020config.py
You will see a lot of options in the file: This may seem like a lot of options, but you can leave most default values as they are.
If you want to get going with the most often used settings, just look at first three:
Pictures directory
This line defines the directory where you put your images. Note that it is recursive, so all subdirectories are included. In the case for GOES imagery case, it will be “/home/pi/images”. Edit the line as follows and don’t forget to include “/home/pi/”.
parse.add_argument("-p", "--pic_dir", default="/home/pi/images")
Delay between images
This line specifies the time between two images in seconds. For a living room picture frame setting, I have found a value of 50 ideal. Don’t make it too short as you need to include the time for the transitions between the images.
parse.add_argument("-v", "--time_delay", default=50.0, type=float, help="time between consecutive slide starts - can be changed by MQTT")
Transition time
This line defines the length of the transitions in seconds. 10 is ideal. If you have a 4K display connected, 5 is ideal.
parse.add_argument("-w", "--fade_time", default=10.0, type=float, help="change time during which slides overlap - can be changed by MQTT")
If you are in a hurry, you can skip the other parameters and jump to “Testing Pi3D”.
Other parameters:
Times before reshuffling
When Pi3D starts, it creates a shuffled playlist of all the images. This is to ensure that every picture is shown exactly once before the playlist restarts. If you set “default=1”, it will reshuffle the playlist every time it has finished. “default=5” will show the same shuffled list five times. I recommend setting it to “1”.
parse.add_argument("-r", "--reshuffle_num", default=1, type=int, help="times through before reshuffling")
Fit to screen
Often, the aspect ratio of an image will not correspond to the aspect ratio of the screen. “default=True” means that the entire image is shown which can lead to black bars left/right or top/bottom (pillar or letterboxing). “default=False” means that the image is stretched until it fills the entire screen. I only upload landscape formatted images on my frame, so I choose “False”.
parse.add_argument("-t", "--fit", default=False, type=str_to_bool, help="shrink to fit screen i.e. don't crop")
Show file names
You can show the filename with the image. Just set “default=10”, if you want to the file name to show, or default=”0″, if you do not want file name to show.
parse.add_argument("-s", "--show_names_tm", default=10.0, type=str_to_bool, help="text over image with file name")
Show latest images first after adding new ones
Whenever new images are added to your images folder, Pi3D will reshuffle the playlist. “recent_n” will play the newest ones first (based on the Exif date), which is nice. You can set this number to “default=10” if you want to show the ten newest images or “0” if you want to turn this functionality off.
parse.add_argument("-n", "--recent_n", default=10, type=int, help="when shuffling the keep n most recent ones to play before the rest")
Checking for new photos
Pi3D regularly checks to see if new images have been added to your images folder. “default=60.0” means that the check happens every minute. Keep this setting.
parse.add_argument("-c", "--check_dir_tm", default=60.0, type=float, help="time in seconds between checking if the image directory has changed")
Frames per second
This value specifies the number of frames during the transition period from one image to another. The more powerful your Raspberry Pi, the higher this value can be, but even with a Pi 4 I found no real difference above “20”, so I would not change this one.
parse.add_argument("-f", "--fps", default=20.0, type=float)
OPTIONAL ~ Activate and configure MQTT
This is a very important setting if you want to remote control your picture frame either through voice with Alexa, Google Home Assistant, iPhone, or Internet of Things devices. Set it to “default=True” if you want to use it.
And if you do, don’t forget to add your MQTT broker server address. If you are using a locally installed broker, just add the IP address or the Bonjour counterpart (“pictureframe.local”). If you don’t have a user and password, just leave the value empty.
Unless you haven’t already done so, don’t forget to install the paho package on your Raspberry Pi which allows for the receiving of MQTT messages. It is just one line:
sudo pip3 install paho-mqtt
For information on installing a local Mosquitto MQTT broker, see here.
parse.add_argument("-m", "--use_mqtt", default=True)
parse.add_argument( "--mqtt_server", default="pictureframe.local")
parse.add_argument( "--mqtt_port", default=1883, type=int)
parse.add_argument( "--mqtt_login", default="")
parse.add_argument( "--mqtt_password", default="")
OPTIONAL –Rotate display 90 degrees – if you want to run screen in verticle format
Rotating the screen for the Raspberry PI 3
A number from 0 to 4 represents each of the possible rotations that the Raspberry Pi supports. A rotation of 90 degrees is 1, 180 degrees is 2, and 270 degrees is 3.
Based on how you want the display rotated, enter one of the following lines to the bottom of the file.
If you want to rotate the orientation of the LCD connection, instead you can use
display_lcd_rotate instead of display_hdmi_rotate.
sudo nano /boot/config.txt
Then Add the setting you want to the bottom of file.display_hdmi_rotate=0
This setting will reset the rotation of your Pi’s screen to normal. This setting represents the default behavior.
display_hdmi_rotate=1
Using this setting will rotate the screen by 90 degrees. This option is equivalent to rotating the screen to the right.
display_hdmi_rotate=2
With this option, you will be rotating the output of the display by 180 degrees. This is the same behavior as inverting the screen.
display_hdmi_rotate=3
Changing this option to 3 will rotate the screen by 270 degrees. This would be the same as rotating your screen to the left.
Once you have entered the line you want, save the file by pressing CTRL + X, then Y, followed by ENTER.
Example#rotate screen
display_hdmi_rotate=1
Rotating the screen for the Raspberry Pi 4
Due to the new video driver used for by the Raspberry Pi 4, you are unable to rotate the screen using the old /boot/config.txt method.
Instead you will need to make use of the xrandr command.
In the terminal of your Raspberry Pi run one of the following commands.
If you want the rotation to affect the second HDMI slot try using HDMI-2 instead of HDMI-1 in the commands below.
DISPLAY=:0 xrandr --output HDMI-1 --rotate normal
This command resets the rotation back to normal.
DISPLAY=:0 xrandr --output HDMI-1 --rotate left
The command above rotates the screen output to the left. This is the equivalent of rotating by 90 degrees.
DISPLAY=:0 xrandr --output HDMI-1 --rotate right
This line rotates the screen to the right. This command is the same as turning the screen by 270 degrees.
DISPLAY=:0 xrandr --output HDMI-1 --rotate inverted
This final command flips the screen. This behavior is the same as rotating the screen by 180 degrees.
ADDING THE GOES IMAGERY
Create GOESstartup-download.sh NOTE: I added support for downloading Himawari-8, GK2A and Sea Surface Temperatures on 11/2/20sudo nano GOESstartup-download.sh
Copy and add this to the new file that you created.
GOESstartup-download.sh
#GOESstartup-download.sh
/usr/bin/python /home/pi/goes/goes_for_lcd_lt_vis.py
/usr/bin/python /home/pi/goes/goes_for_lcd_ch15.py
/usr/bin/python /home/pi/goes/goes_for_lcd_full_vis.py
/usr/bin/python /home/pi/goes/goes_for_lcd_sa_vis.py
/usr/bin/python /home/pi/goes/goes_for_lcd_FD_vis.py
/usr/bin/python /home/pi/goes/goes_for_lcd_GL_vis.py
/usr/bin/python /home/pi/goes/goes_for_lcd_17_vis.py
/usr/bin/python /home/pi/goes/goes_for_lcd_conus_GLM.py
/usr/bin/python /home/pi/goes/Himawari_FD_FC_vis.py
/usr/bin/python /home/pi/goes/goes_for_lcd_WC_vis.py
/usr/bin/python /home/pi/goes/goes_for_lcd_GK2A.py
/usr/bin/python /home/pi/goes/goes_for_lcd_SST_vis.py
Once you have entered the lines, save the file by pressing CTRL + X, then Y, followed by ENTER.
Load your first set of images- you will only need to do this once, so that the PictureFrame2020.py has some images to work with. This will take a couple of minutes!
sudo bash GOESstartup-download.sh
sudo reboot
Configure the PI to load first set of images on reboot.
sudo nano /etc/rc.local
Add the following before the exit 0 line in this file
sleep 10
bash /home/pi/GOESstartup-download.sh &
Create a cron entry for autoloading the GOES imagery
crontab -e
Paste this into the crontab
0 * * * * /usr/bin/python /home/pi/goes/goes_for_lcd_lt_vis.py
3 * * * * /usr/bin/python /home/pi/goes/goes_for_lcd_ch15.py
5 * * * * /usr/bin/python /home/pi/goes/goes_for_lcd_full_vis.py
7 * * * * /usr/bin/python /home/pi/goes/goes_for_lcd_sa_vis.py
9 * * * * /usr/bin/python /home/pi/goes/goes_for_lcd_FD_vis.py
11 * * * * /usr/bin/python /home/pi/goes/goes_for_lcd_GL_vis.py
13 * * * * /usr/bin/python /home/pi/goes/goes_for_lcd_17_vis.py
15 * * * * /usr/bin/python /home/pi/goes/goes_for_lcd_WC_vis.py
17 * * * * /usr/bin/python /home/pi/goes/goes_for_lcd_conus_GLM.py
19 * * * * /usr/bin/python /home/pi/goes/Himawari_FD_FC_vis.py
21 * * * * /usr/bin/python /home/pi/goes/goes_for_lcd_GK2A.py
23 * * * * /usr/bin/python /home/pi/goes/goes_for_lcd_SST_vis.py
What you will be loading via the PI script above is
goes_for_lcd_lt_vis.py = Latin America G16
goes_for_lcd_ch15.py = North America Channel 15 Enhanced with precip G16
goes_for_lcd_full_vis.py = Full Disk view of the earth from my receiver G16
goes_for_lcd_sa_vis.py = South America G16
goes_for_lcd_FD_vis.py = Full Disk view of the earth from NOAA G16
goes_for_lcd_GL_vis.py = Great Lakes North America G16
goes_for_lcd_17_vis.py = Full Disk view of earth from G17
goes_for_lcd_WC_vis.py = West Coast North America G17
goes_for_lcd_conus_GLM.py = Conus USA with Lightning Mapper
goes_for_lcd_GK2A.py = GK2A Satellite Full Disk
goes_for_lcd_SST_vis.py = Sea Surface Temperatures
Now, you should have a working Picture Frame enter:
sudo reboot
And when it starts back up you should have NOAA Goes Imagery scrolling up or down, left or right across your screen.
Editing the Python Scripts:
If you want to select a different image to be downloaded or displayed, you will need to edit the scripts, or, better yet, copy a script then edit it and save it as a new file. As long as you have a good link to an image, you can display it. It could be from GOES, Himawari-8, GK2A, Eumstat, NOAA 20, any one of these as long as you have a link to the image.
There are basically two or three areas that you would need to edit. As shown in the below script for downloading the full-disk view from GOES17 and resizing the image. If we wanted to change to say. down load the current image for Himawari 8 in full color do this:
Create a copy of the current script, and edit it in Notepad++
Look for this line:
remote = r"https://cdn.star.nesdis.noaa.gov/GOES17/ABI/FD/GEOCOLOR/5424x5424.jpg"
And replace it with the correct link for Himawari 8
remote = r"http://rammb.cira.colostate.edu/ramsdis/online/images/latest_hi_res/himawari-8/full_disk_ahi_natural_color.jpg"
Then edit this line:
rsimg.save("/home/pi/images/goes_17_vis.jpg")
to this:
rsimg.save("/home/pi/images/Himawari_8_vis.jpg")
you can also edit the resize porting of the script to a cropping function is you wanted to just, as an example crop the image so just New Zealand is shown.
Example script:
#!/usr/bin/python
#
# Core code credit: Simple downloading with progress indicator, by Cees Timmerman, 16mar12.
# Modified for GOES downloader by Jeff Kelly K2SDR
# Modified for GOES Resizing by Usradioguy.com 2020

import os
import urllib2
import time
import ssl
import sys
from PIL import Image
#next line for MAC
ssl._create_default_https_context = ssl._create_unverified_context
timestr1 = time.strftime("Download Date:%m%d%Y Time:%H%M")
print ""
print timestr1
timestr = time.strftime("%m%d%Y_%H%M")
cwd = os.getcwd()
path = (cwd + "/")
print path
file_name = "temp.jpg"
print file_name

def goes_conus(file_name):

remote = r"https://cdn.star.nesdis.noaa.gov/GOES17/ABI/FD/GEOCOLOR/5424x5424.jpg"
    local = path + file_name

    u = urllib2.urlopen(remote)
    h = u.info()
    totalSize = int(h["Content-Length"])

    print "Downloading %s bytes..." % totalSize,
    fp = open(local, 'wb')

    blockSize = 8192 #100000 # urllib.urlretrieve uses 8192
    count = 0
    while True:
        chunk = u.read(blockSize)
        if not chunk: break
        fp.write(chunk)
        count += 1
        if totalSize > 0:
            percent = int(count * blockSize * 100 / totalSize)
            if percent > 100: percent = 100
            print "%2d%%" % percent,
            if percent < 100:
                print "\b\b\b\b\b",  # Erase "NN% "
            else:
                print "Done."

    fp.flush()
    fp.close()
    if not totalSize:
        print
    print ""
    print "Done downloading."

# The crop method from the Image module takes four coordinates as input.
# The right can also be represented as (left+width)
# and lower can be represented as (upper+height).
#(left, upper, right, lower) = (20, 20, 100, 100)

def resize(file_name):
print ""
print "Resizing Image to 800x800."
image = Image.open(path + file_name)
rsimg = image.resize((800, 800))
rsimg.save("/home/pi/images/goes_17_vis.jpg")
print ""
print "Done."

goes_conus(file_name)
resize(file_name)
If you want to display your own imagery received by you from a Satellite you could change this portion of the code:
remote = r"https://cdn.star.nesdis.noaa.gov/GOES16/GLM/CONUS/EXTENT/2500x1500.jpg"
local = path + file_name
u = urllib2.urlopen(remote)
h = u.info()
totalSize = int(h["Content-Length"])
To this (as an example):
#remote = r"https://cdn.star.nesdis.noaa.gov/GOES16/GLM/CONUS/EXTENT/2500x1500.jpg"
local = home\pi\goesimagery\Goes16latest.jpgu = urllib2.urlopen(local)
h = u.info()
totalSize = int(h["Content-Length"])
You could add in a section to the script to look on a remote folder as well, and then have the script choose the most recent file with something like this:
import glob
import os

list_of_files = glob.glob('/home/pi/goes/goes16/fd/*.jpg')
latest_file = max(list_of_files, key=os.path.getctime)
print latest_file