
Inmarsat Decoding
![]()
What is Inmarsat?
Inmarsat is a communications service provider with several geostationary satellites in orbit.
Inmarsat provides services such as satellite phone communications, broadband internet, and
short text and data messaging services. Like GOEs, Inmarsat satellites are geostationary meaning that the Inmarsat satellites are in a fixed position (relative to earth) in the sky and do not move.
The Inmarsat 3-F(x) satellites have transponders transmitting data in L-Band (1.5 GHz) that can
be decoded by a simple patch antenna, or as I chose, a parabolic grid dish with a feed especially built for Inmarsat
The modes we will cover on this page are Aeronautical (Classic Aero or ACARS) and
Inmarsat-C (STD-C) using a Nooelec SDR SmartTee XTR connected to the new Nooelec Inmarsat/Iridium/Hydrogen feed/boom that mounts on the same parabolic dish that is used for the GOES receiving system. The Inmarsat system is not limited to only these types of networks.
Inmarsat Aero in this article is the Forward TDM link from the ground station to the plane. The links use OBPSK or OQPSK modulated with 600, 1200, and 10500 bps signals. The 600 and 1200 bps links are part of Inmarsat’s Classic Aero service, the 10500 bps link is part of Inmarsat’s Aero H and H+ services which are capable of transmitting both data (10.5 kbps) and digital voice (9.6 kbps).
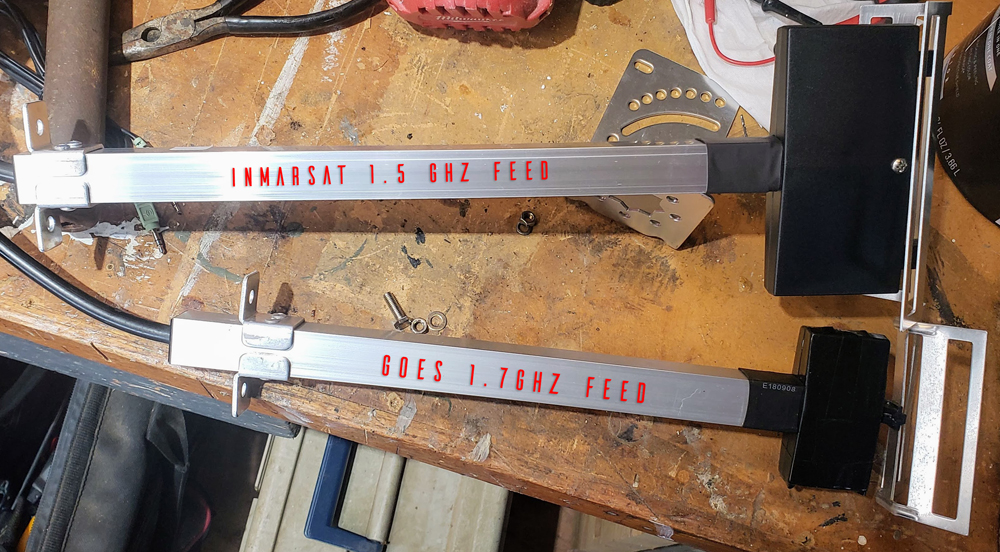
The Inmarsat/Iridium/Hydrogen feed/boom from Nooelec
Nooelec, known for their SDR and LNA’s sent me the new Inmarsat/Iridium/Hydrogen feed/boom months prior to release for me to test, along with a Sawbird+ IO LNA to amplify the signal while filtering out unwanted sideband frequencies.


Construction and testing.
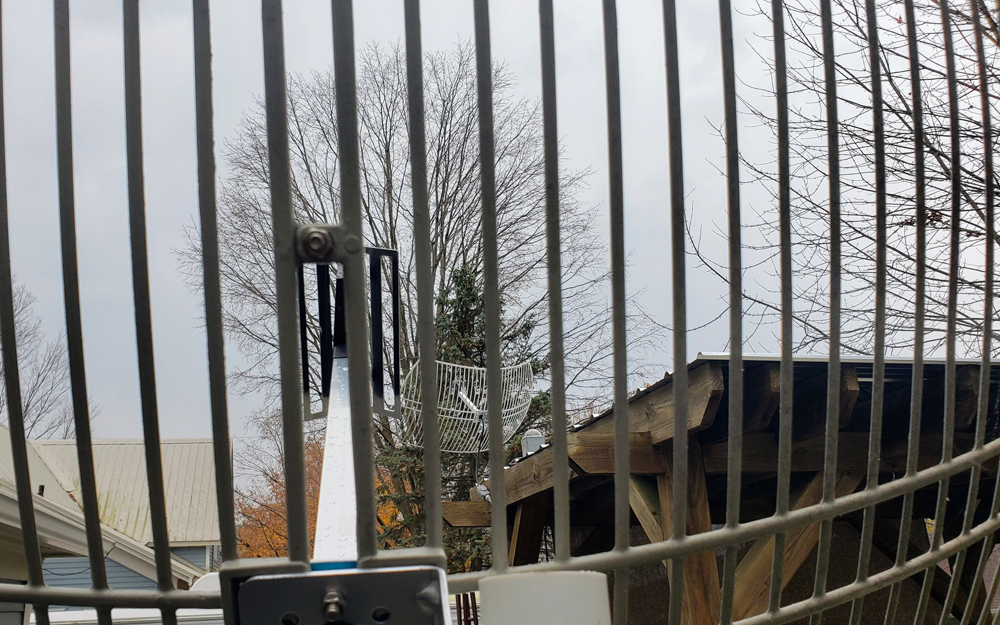
I assembled the feed onto a spare wifi grid dish and temporarily mounted it to a 2″ PVC pipe placed in a heavy patio umbrella stand. In the photos, you can see the feed is quite a bit larger than the feed used for GOES satellites.

Using a compass I sighted the dish in at 98° West, and eyeballed the elevation at my location which was 39.8°. I connected the Sawbird+ IO at the dish feed and then into the Nooelec SDR SmarTee XTR with a barrel connector. Then I connected the SDR into a 30′ USB extension cable (powered) then I ran the USB inside to my PC.
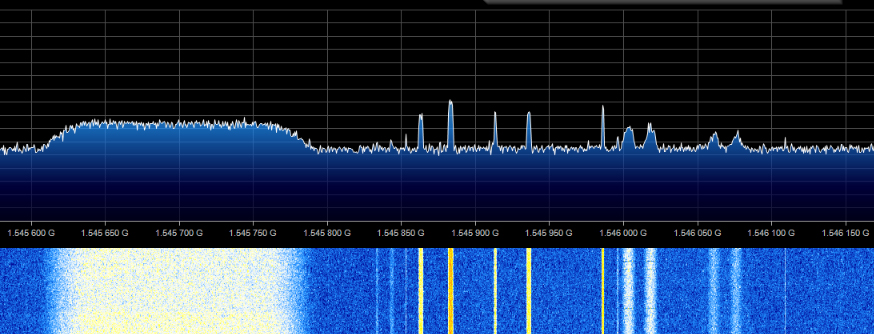
Firing up my trusty SDR# software v1.0.0.1700 I tuned to about 1545.00 Mhz Surprisingly I was dead on to the sat! I should point out that it seems like every time I test something new, I pick the worst days to do it on. This was the case during testing. The first day the skies opened up and it rained and rained and the temperatures dropped. Good thing I wrapped the LNA and SDR in a Ziploc bag! That night, and into the next day we had a high wind warning issued and the Inmarsat rocked side to side in the gusts, but my signal remained great, so it is clearly more forgiving than a GOES satellite. Later I swung the dish and pointed it at Inmarsat F5 at 54°W, and, even though slightly blocked by the side of the house, I was able to get a decent signal and decode.
Decoding Inmarsat
There are a few different decoders out there, and I chose to use Jaero, and Scytalec. We’ll start with Jaero first.
Installing and using JAERO
1. Installing a Virtual Audio Cable
The first thing you will need to do if you haven’t already used a Virtual Cable for APT decoding or other applications, is to install a Virtual Cable to run the sound output of the SDR through your PC
A virtual audio cable allows you to pipe audio from an application like SDR#
into another application (a decoder like JAERO) digitally.
If you already have a virtual audio cable package installed, you can skip to the next section. If you don’t have a virtual audio cable application installed, download a Virtual cable app and install it, I use VB-CABLE. Close any running apps, install the virtual audio cable and reboot your computer. When your computer boots back to your desktop, your computer will now have a virtual audio cable pair installed on the system.
2. Installing and Setting up JAERO
Now Download and install Jaero. I created an Inmarsat folder and installed all the software for Inmarsat decoding into it as such:
C:\INMARSAT\
       ----------->\JAERO\
       ----------->\Scytalec\
JAERO is a program that decodes ACARS (Aircraft Communications Addressing and Reporting
System) messages sent by satellites (in this case Inmarsat) to Airplanes (SatCom ACARS). This is
commonly used when airplanes are well beyond VHF range.
JAERO can be downloaded from the link above. Pick the latest version of the software
After downloading the installer, double-click the setup file and install it on a drive in your system.
Now it’s time to put it all together. Start SDR# and under the RADIO dropdown select USB and a bandwidth of about 3,000 to 4,000. Then Under the AUDIO drop-down in Output Select your VB Cable_Virtual C with a latency of 100. Be sure Filter Audio is UNCHECKED.
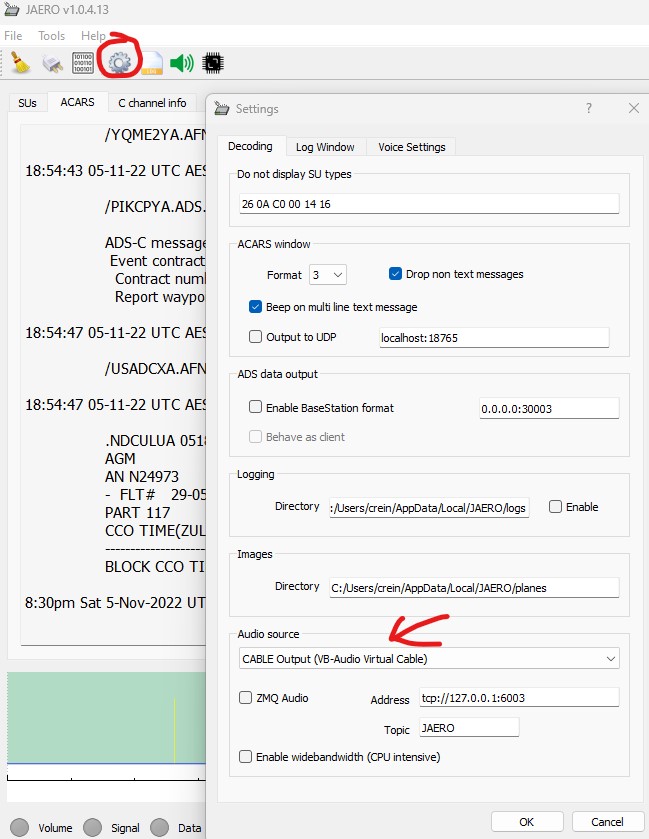
Start and run JAERO. Under Settings, and the Decoding tab – Audio settings, choose your VB Cable.
Press the play icon within SDR# and tune to 1545.109 MHz and look for the Inmarsat signals. You may have to adjust your gain high to get a good usable signal. Adjust the volume slider to about 3/4 high.
Pay attention to the Volume, Signal, and Data icons on the lower left corner of JAERO.
- The Volume Icon must be GREEN, to high a volume from the SDR and it will be red, too low yellow or gray, adjust volume until it is a steady GREEN.
- The Signal Icon should be GREEN, double check your settings on SDR and make sure you have a good signal.
- The Data Icon will turn GREEN when data packets are received, and they should show up in “SUs” tab in JAERO.
Once enough data comes in, you should start seeing ACARS information in the ACARS tab.
_______________________________ADD HERE______

STD-C transmissions are broadcasted on fixed frequencies called the NCSC channel.
The NCSC frequencies and the region they cover
Inmarsat satellite: Inmarsat-4 F3 (AOR-W)
Position: 98° West
Frequency: 1.537.70 GHz
Inmarsat satellite: Inmarsat-3 F5 (AOR-E)
Position: 54° West
Frequency: 1.541.45 GHz
Inmarsat satellite: Inmarsat-4 F1 (IOR)
Position: 25° East
Frequency: 1.537.10 GHz
Inmarsat satellite: Inmarsat-4 F1 (POR)
Position: 143.5° East
Frequency: 1.541.45 GHz
Decoding Marine Inmarsat Messaging
Installing RTL SDR Software
UPDATED 04, March 2023
Manual Installation
These instructions assume you are starting with the latest Raspberry Pi OS from the Pi site. I would recommend the Lite version (headless) it’s all you need.
Before you start installing RTL-SDR you should bring the OS up to date as follows:
sudo apt update && sudo apt full-upgrade -y && reboot
With the updated image the next step is to install a few packages that are required by the RTL-SDR server. You may already have some of these so don’t worry if you see a message that you already have the latest version.
To install these packages, type the following at the LXTerminal command line.
sudo apt-get install -y git cmake libusb-1.0-0-dev
Now you can download the RTL-SDR code from osmocom by typing the following at the command line:
git clone git://git.osmocom.org/rtl-sdr.git
The next step is to build RTL-SDR using the following commands. NB: Some of these may take a while so it’s probably time for a beer!
- cd rtl-sdr
- mkdir build
- cd build
- cmake ../ -DINSTALL_UDEV_RULES=ON
- make
- sudo make install
- sudo cp ../rtl-sdr.rules /etc/udev/rules.d/
- sudo ldconfig
Blacklist the DVB-T Drivers
The later versions of Raspbian include standard drivers so that the Dongles can operate in their original role as a USB Radio/TV device. Unfortunately, these drivers prevent access to the dongle by the rtl-sdr software. The solution is to create a dedicated blacklist file to prevent the unwanted drivers from loading. Here’s the process:
From the command line enter the following:
sudo nano /etc/modprobe.d/blacklist-rtl.conf
This creates a new file so enter the following lines:
blacklist dvb_usb_rtl28xxu
blacklist rtl2832
blacklist rtl2830
Press Control-X followed by Y to exit and save the modified file. NB: Do not press the X to close the window
Now reboot the Pi: sudo reboot
That completes the build and you can run a quick test by making sure your dongle is connected and typing: rtl_test -t
To start the server you need to access the Pi command line and type: rtl_tcp -a ‘your Pi’s IP address’. As a practical example, the start command for my setup is:
rtl_tcp -a 192.168.1.100
Auto Boot
It is very easy to configure the Pi to automatically run the SDR server when it powers-up. This is done by modifying the rc.local file that automatically runs on boot. We need to include two new lines in the file. The first delays execution for 10 seconds whilst the network starts and the second runs the command to start the server. The delay is necessary because the new Jessie release runs rc.local before the network is up so we won’t have the vital IP address. Here’s the updated rc.local file with the additions in red:
sleep 10
_IP=$(hostname -I) || true
if [“$_IP”]; then
printf”My IP address is %s\n” “$_IP”
/usr/local/bin/rtl_tcp -a $_IP &
fi
exit 0
To open the rc.local file for editing type:
sudo nano /etc/rc.local
Now update the content as shown above.
Type control X followed by Y and Enter to save the changes.
That’s it – you should have an RTL-Server that auto-boots. I don’t recommend using a Wi-Fi dongle but if you do you will need to increase the sleep time as the network setup will take longer.
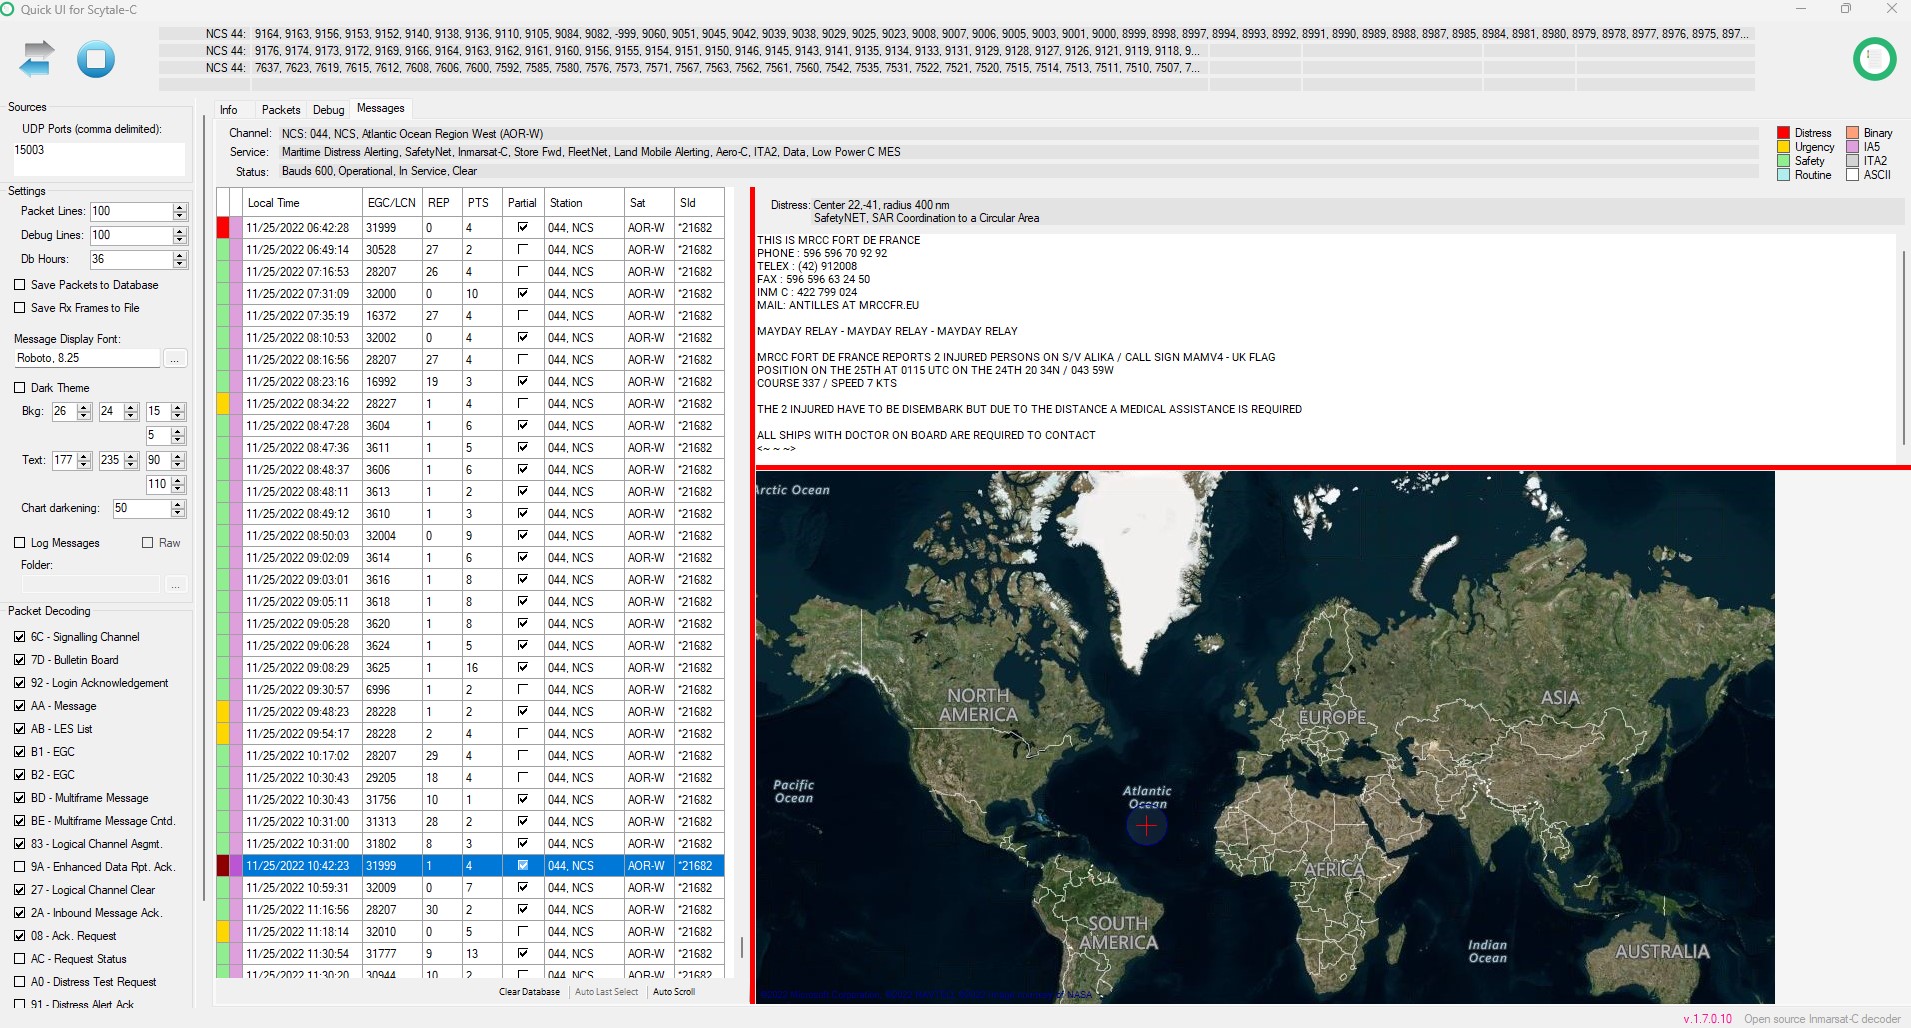
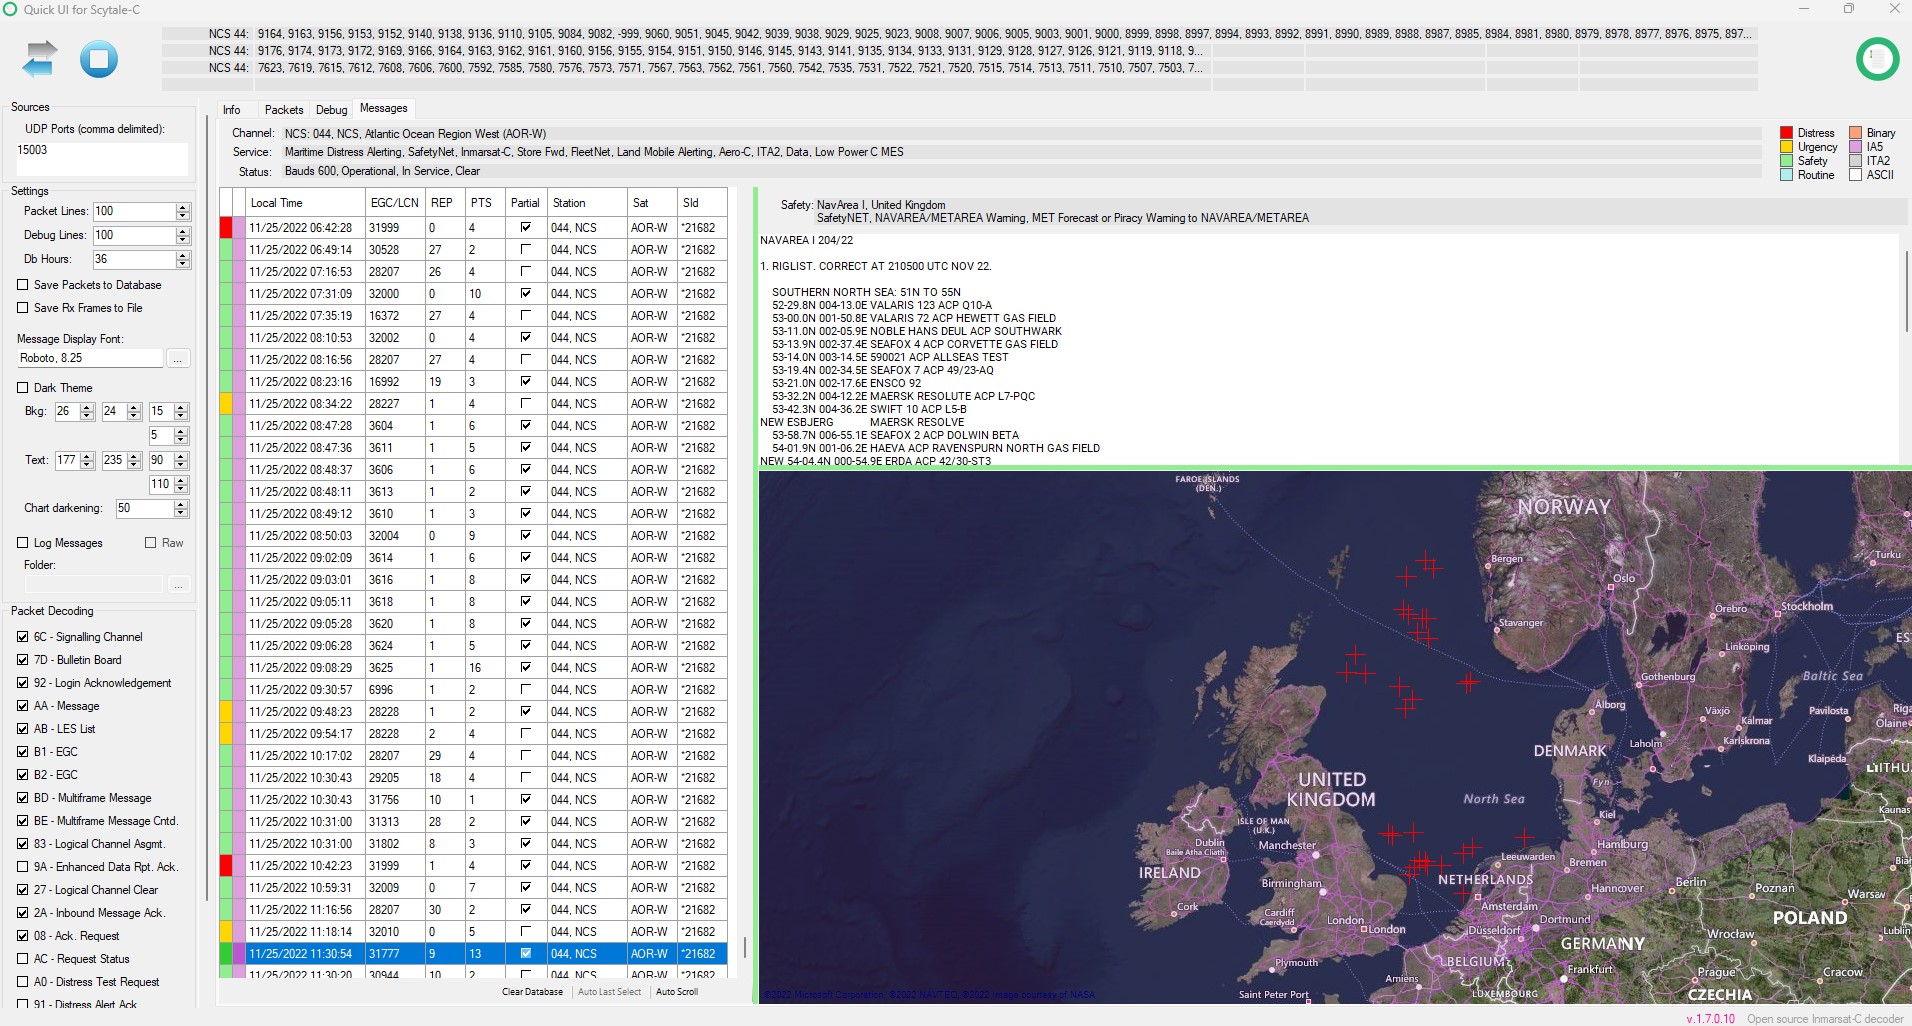
Scytale-C
Scytale-C is an Inmarsat STD-C decoder that decodes the L-band geosynchronous satellite signal that transmits at 1.541450 GHz.
The software is available for Windows, and a ready to use binary .exe file can be downloaded from the downloads section of the BitBucket repo.
If you use SDR# be sure and use the Scytale-C plugin, which works very well with the Scytale-C UI Shown Below

WARNING! All messages are directed to their recipients! If you’re not the recipient, you should not share them, and delete the received message!