
METEOR M2- Series
![]()
Meteor M No. 2-2, 2-3, 2-4
Contents
- Current Meteor M2-2, M2-3, M2-4 Status
- METEOR M2-3 and METEOR M2-4 TLE
- SOFTWARE FILES
- DDE Tracking Client Setup Information and Process
- LRPT Decoder Settings
- M2 LRPT Decoder V59
- LRPT FILE-RENAMER
- MeteorDemod
- MeteorGIS 2.24/2.25 IR Imagery temp fix
- USING SATDUMP to Decode and Automate the process for Meteor
- Launch Schedule for new Meteors
- What Happens during a test mode?
Current Meteor M 2-3 AND Meteor M2-4 Status
Meteor M 2-3 See Update notes below
| Meteor M 2-4 See Update notes below
|
M2-2- Following a collision with a micrometeorite, the power system aboard Meteor M2-2 has been compromised. there is insufficient battery power to enable the LRPT stream. HRPT was transmitting up until July of 2024, however that has since stopped. VNIIEM (the Russian State Corp that built the satellite) has since stopped supporting logistics for M2-2 HRPT and it is presumed that the system has failed.
METEOR-M2 4 TLE from Celestrack https://usradioguy.com/NOAA/M2.4_tle.txt
Update Notes- Meteor M2-4
| Meteor M 2-4 | |
|---|---|
| DATE | EVENT |
| 26_March_2025 | Switch to 123 mode |
| 22_Sept_2024 | Switch to 124 Mode |
| 16_May_2024 | Planned frequency switch at approximately 13:00 MSK, (10:00 UTC) there will be a switch to 137.9 MHz |
| 15_May_2024 | Switch to 137.1 MHz at 72K with 1,2,3 Mode 10:40 Coordinated Universal Time (UTC) |
| 13_May_2024 | Switch to 137.9 MHz |
| 09_May_2024 | Switch to 123 mode |
| 07_May_2024 | Switch to 137.1 MHz |
| 06_May_2024 | Switch to 137.9 MHz at 72K |
| 03_May_2024 | Switch to 137.1 MHz at 80K with 4,5,6 running for tests approximately 09:40 Coordinated Universal Time (UTC) on 03.05.2024 |
| 26_April_2024 | Switch to 137.9 MHx |
| 24_April_2024 | Switch to 137.1 MHz at 80K with 4,5,6 running for tests approximately 08:00 Coordinated Universal Time (UTC) on April 24, 2024 |
| 22_April_2024 | Switch to 137.9 and 80k |
| 18_April_2024 | Switch to 137.1 and 80k at approximately 06:15 UTC |
| 17_April_2024 | Switch to 137.9 MHz |
| 15_April_2024 | Switch to 72K |
| 12_April_2024 | Switch to 137.1 MHz |
| 10_April_2024 | Mode switch to 80K on LRPT |
| 08_April_2024 | LRPT Transmission switched to 137.9 MHz |
| 05_April_2024 | Transmission off for about 4 hours, then returned to normal. |
| 03_April_2024 | LRPT and HRPT Back on and transmitting Imagery! |
| 20_March_2024 | X-Band Transmissions have returned on 8128 Mhz |
| 11_March_2024 | LRPT Transmitter is off. HRPT Transmitter is OFF, X Band Transmitter is Off |
| 09_March_2024 | LRPT is transmitting, but imagery cannot be decoded. Possible test / Sensor heating for transition to IR. |
| 05_March_2024 | MTVZA is Active and transmitting (Multi-purpose imager with temperature/humidity sounding channels) 8128 MHz XBand |
| 05_March_2024 | LRPT and HRPT back in active transmitting modes |
| 04_March_2024 | M2-4 is in testing phase and LRPT and HRPT could be turned off, change frequencies, and modes, with little or no notice. |
| 01_March_2024 | GGAK-M/RIMS-M and GGAK-E/SKIF-6 Sensors Warmup and Initialization |
| 01_March_2024 | 137.1 Mhz and 1700 Mhz Transmitters turned on |
| 29_February_2024 | Preliminary TLE’s Released. Solar Panels Extended into operating Position. |
| 29_February_2024 | Meteor M2-4 Launched |
Update Notes- Meteor M2-3
| Meteor M 2-3 | |
|---|---|
| DATE | EVENT |
| 08_Sept_2025 | Switched to 124 Mode (IR) at 00:48 UTC |
| 26_March_2025 | Switch to 123 mode |
| 23_Sept_2024 | Switched to 124 Mode |
| 21-March_2023 | MCC reset System -Satellite transmitting imagery again, MODE now 123 |
| 19_March_2023 | Satellite transmitting carrier- no imagery |
| 09_March_2024 | Back to 124 Mode |
| 08_March_2024 | Possible Test Mode, at 1330 UTC MSU-MR generating odd scan lines , See https://usradioguy.com/meteor-satellite/#testmode |
| 23_January_2024 | Back to 124 IR |
| 19_January_2024 | 0900 UTC Command Issued to restart. – Systems seems to be working. |
| 18_January_2024 | Issues in data for Reed Soloman encoding. |
| 17_January_2024 | Meteor Switched to 123 RGB for Three Days |
| 16_January_2024 | MSU-MR Channel 4 Issues causing stripes on band. |
| 04_January_2024 | MCC Failover, MCC made restart at 13:15 UTC |
| 31_December_2023 | MSU-MR device on M2-3 out of calibration mode |
| 28_December_2024 | MSU-MR device on M2-3 in calibration mode, expect imagery to reflect this. |
| 30_November_2023 | Meteor M2-3 Back to 137.9 MHz Channels 1,2,4 out of test mode. 1600 UTC |
| 27_November_2023 | Today at about 13.00UTC the MSU-MR device on M2-3 will be put into test mode for 3 days. |
| 11_November_2023 | Activation of visible channels on M2-3 in LRPT is expected on Sunday. But it will only be for a few days. |
| 30_October_2023 | Timing corrected on Meteor M 2-3. |
| 29_October_2023 | Error in Meteor M2-3 Time Stamps. Can cause problems when using a map overlay |
| 25_October_2023 | 12:15 UTC Meteor M2-3 Rebooted and IR compression resolved. |
| 20_October_2023 | Data Compression increased, “MCC is aware of the compression issue aboard the Meteor as it started yesterday, and a satellite reboot is expected in the next few days. Currently, some tests are in progress and a reboot will be performed once the tests finish.” |
| 6_October_2023 | Switched to RGB 1-2-4. |
| 8_September_2023 | Problems with Meteor onboard time. |
| 24_August_2023 | Switched to 72K. |
| 11_August _2023 | Moscow time switch to 80k. IR channels are turned off, visible ones are connected. |

Detailed characteristics of the Multispectral scanning imager-radiometer
| MSU/MR No. | Central wavelength | Spectral interval | SNR or NEΔT @ specified input | Output |
|---|---|---|---|---|
| APID 64 | 0.60 µm | 0.50 – 0.70 µm | 1000 @ 80 % albedo | Visible |
| APID 65 | 0.90 µm | 0.70 – 1.10 µm | 1000 @ 80 % albedo | Visible |
| APID 66 | 1.70 µm | 1.60 – 1.80 µm | 1000 @ 80 % albedo | Visible |
| APID 67 | 3.80 µm | 3.50 – 4.10 µm | 0.5 K @ 300 K | Infrared |
| APID 68 | 11.00 µm | 10.5 – 11.5 µm | 0.15 K @ 300 K | Infrared |
| APID 69 | 12.00 µm | 11.5 – 12.5 µm | 0.15 K @ 300 K | Infrared |

METEOR M2-3 has successfully launched and is now in orbit and began transmitting LRPT and HRPT images, just 5 hours 58 minutes after launch.


Meteor-M satellites are Russian-owned weather imaging satellites that are in sun-synchronous polar orbit. They transmit images to Earth in the Low-Resolution Picture Transmission (LRPT) format at 137 MHz, and High-Resolution Picture Transmission (HRPT) at 1700Mhz making them almost as easy to receive as the older NOAA APT satellites. Unfortunately, all prior Meteor M satellites have suffered an early ending or partial ending to their mission due to technical faults or micrometeorite collisions. (Meteor M2-2 still transmits on HRPT)
However, on June 27, 2023, the latest Meteor M2-3 satellite was successfully launched on a Soyuz-2 rocket and is already transmitting LRPT and HRPT images of the Earth.
What sensor sends the imagery?
On board the spacecraft is the MSU-MR The MSU-MR is a 70-kilogram multispectral scanning payload that uses six spectral bands to monitor cloud cover and measure sea and land surface temperature. The instrument covers one visible band, one crossover band, and four infrared bands.
The visible channel covers a band of 0.5-0.7 micrometers (µm), the visible-near-infrared (VNIR) channel covers 0.7-1.1 µm, the shortwave infrared (SWIR) channel covers 1.6-1.8 µm, the midwave infrared (MWIR) channel covers 3.5-4.1 µm, and the two thermal infrared (TIR) channels cover 10.5-11.5 and 11.5-12.5 µm.
The instrument operates at a scanning angle of 54°, covering a 2,800-kilometer ground swath with a spatial resolution of 1 kilometer and an angular resolution of under 1.4 milliradians (mrad) in all channels. The temperature measurement error in the IR channels is less than 0.5 Kelvin at an operational radiation temperature range of 212-313 Kelvin. The instrument is operated continuously, generating a steady stream of data at a symbol rate of either 72000 or 80000 kilobits per second. (72K or 80K)
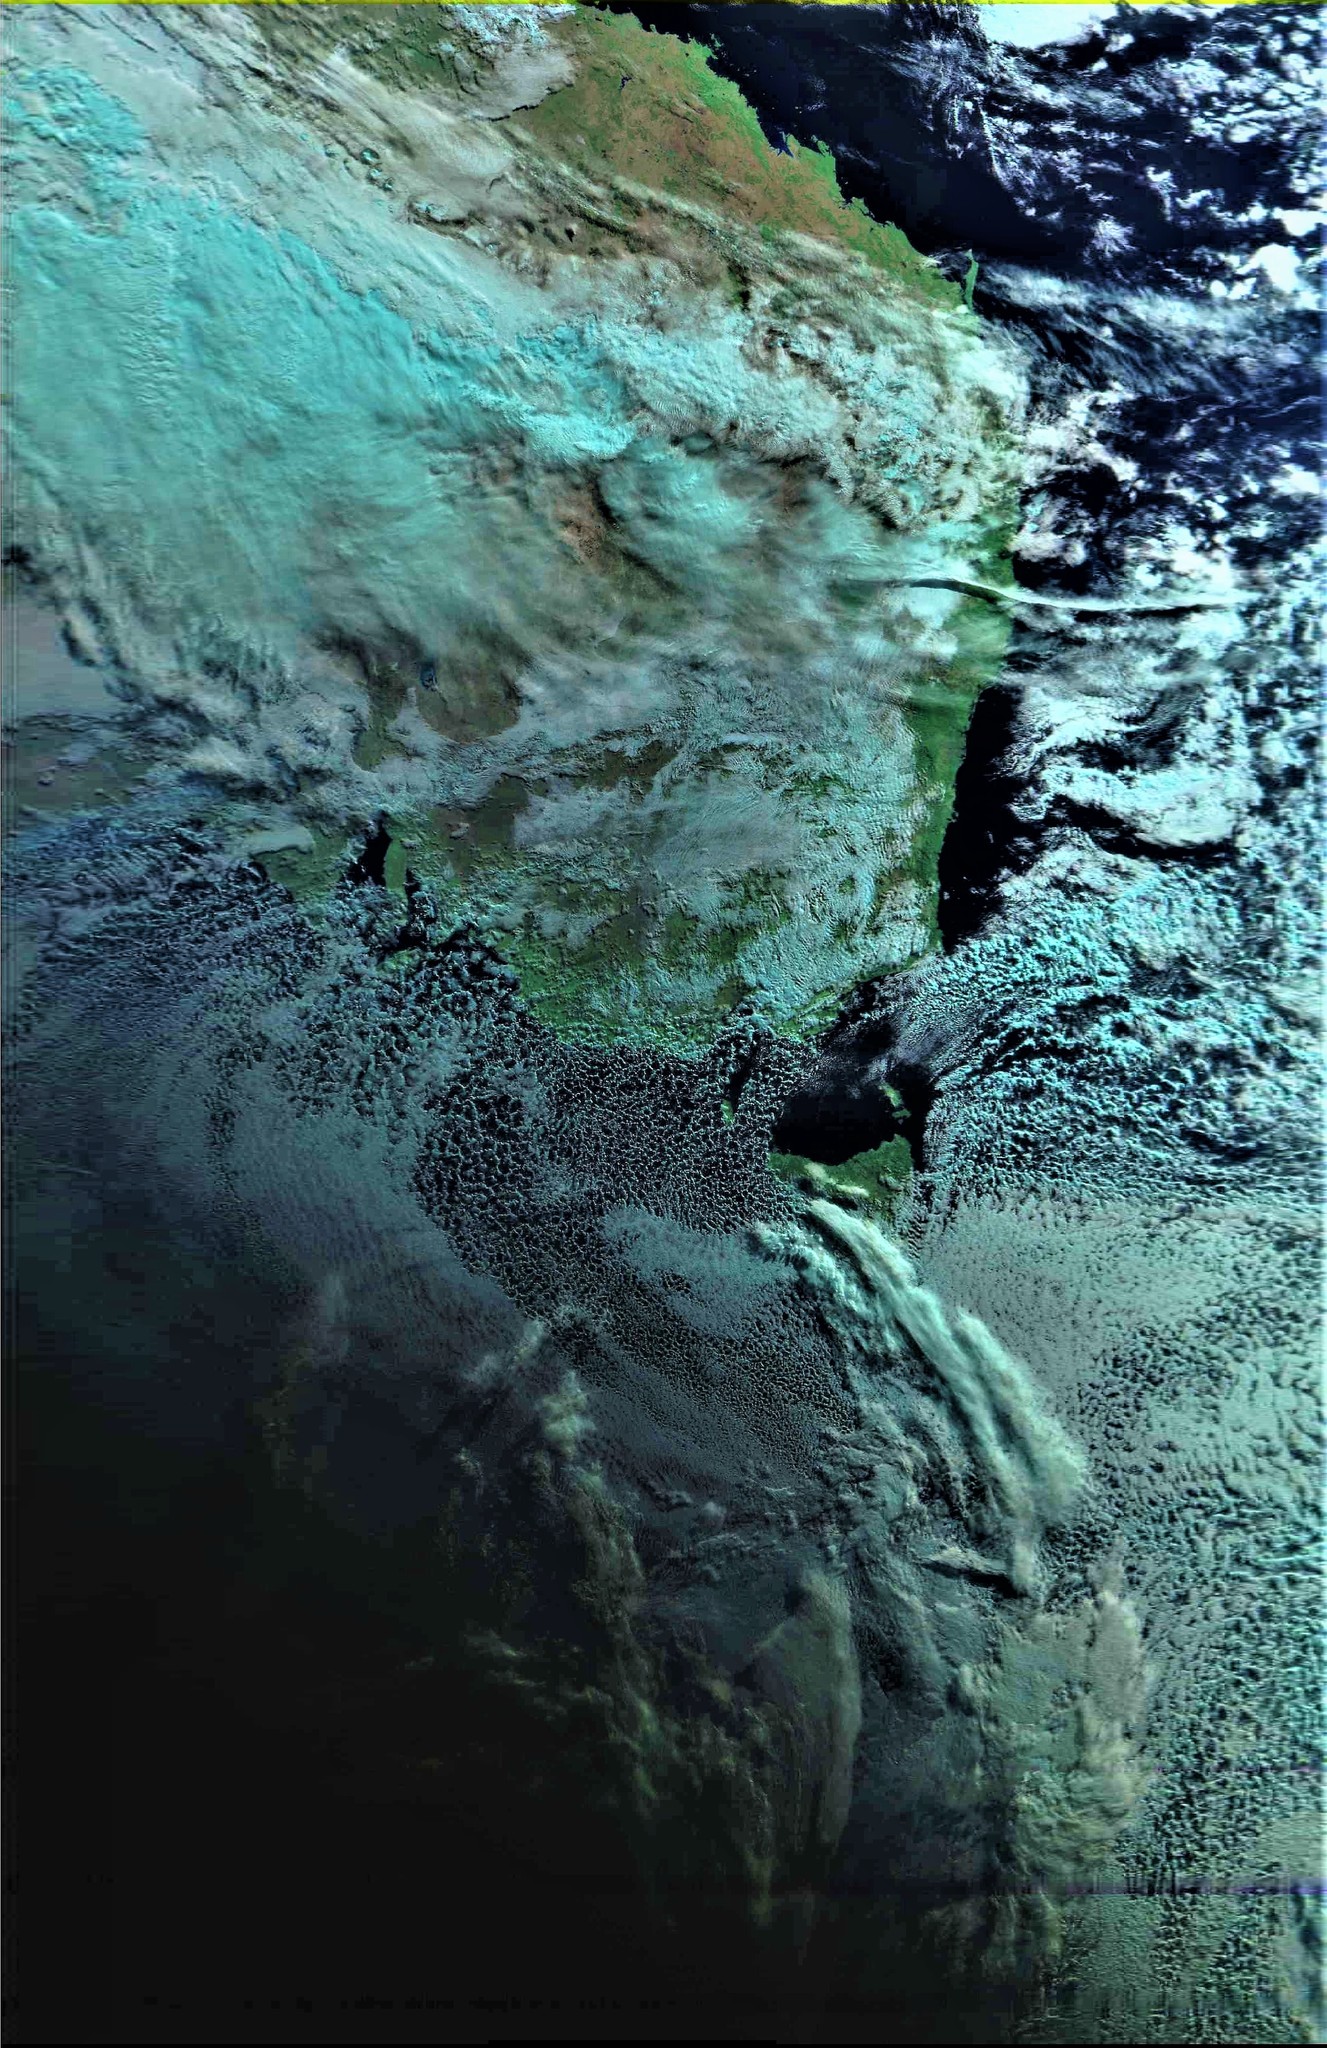
Sometimes you may receive an anomalous image, with very strange hues to the image.
Due to its long time in storage, after the construction phase, gases and residue from maneuvering thrusters, as well as some moisture, collect on the imager assembly of the Meteor M2-3 satellite. From time to time, due to the very cold temperatures needed for infrared imagery, these gases and residues condense on the optics. To address this issue, the operators turn off the cooling system and let the entire imager assembly warm up, which allows the contaminants to evaporate. Some of the contaminants go into space, while others collect on cooler parts of the satellite. During this warm-up process, the IR detector is oversaturated and no IR imagery is possible. When the process is done, the operators cool down the detectors again, and IR sensing resumes. This cycle continues several times until the amount of gases and moisture inside the optic is low enough for IR imagery to work continuously.
This has happened before with other Meteor satellites, but it usually only lasts a few weeks. However, with Meteor M2-3, it is taking longer due to the long time it was in storage on Earth.
To receive images from the Meteor M2-3 satellite, you will need an appropriate 137 MHz satellite antenna such as a v-dipole, Turnstile, or QFH. An RTL-SDR or any similar SDR can be used as the receiver.
Satdump Software is capable of decoding both the HRPT and LRPT from Meteor M2-3. Other software such as MeteorGIS 2.25(beta) and LRPT_Decoder also can decode the satellite.
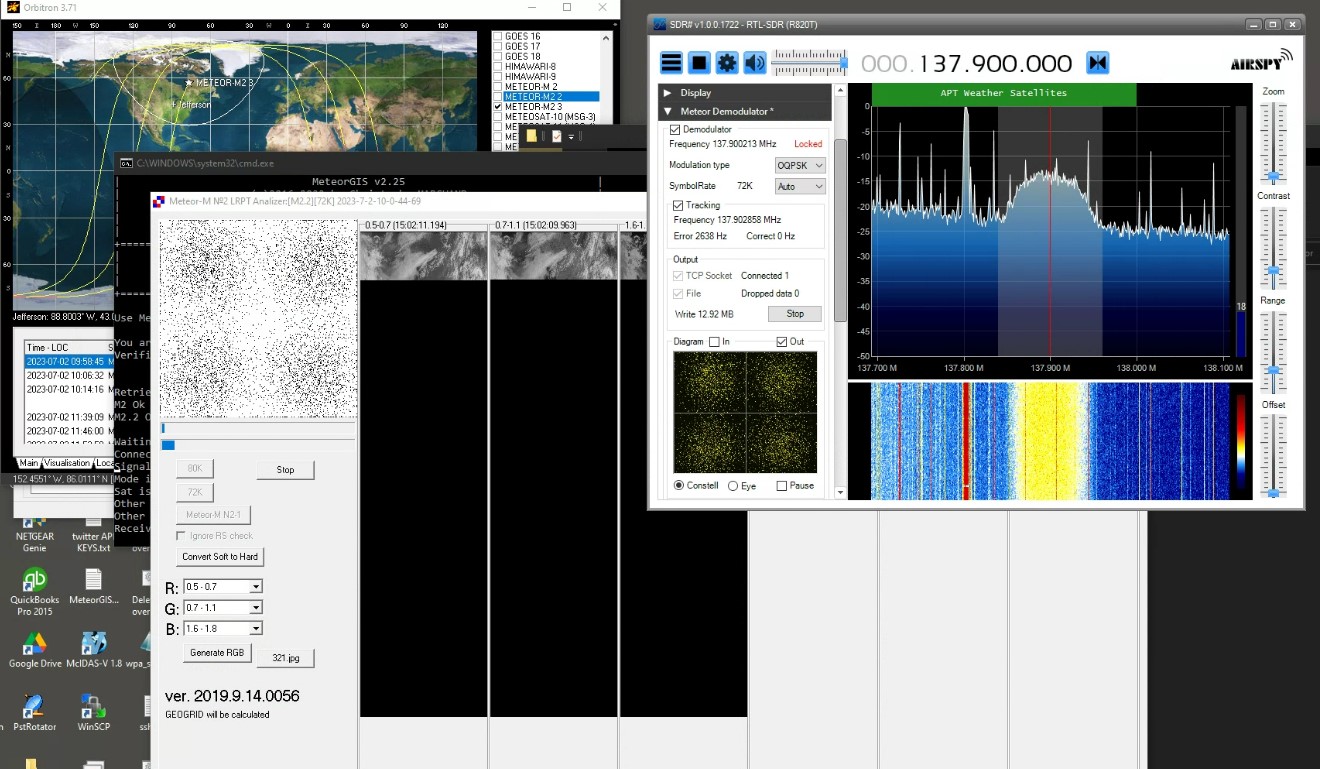
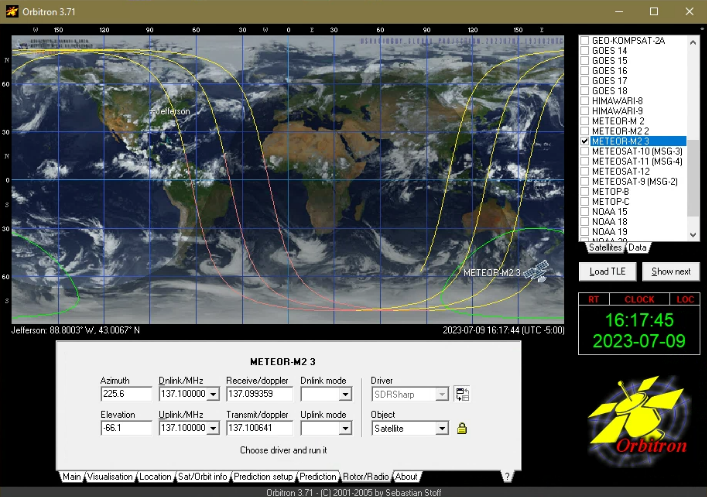
Here are some basic settings that I use for automatic Meteor M2-3 Reception:
METEOR M2-3 and M2-4 TLE
I have an automated script that uploads the current Meteor 2-3 and 2-4 TLE to my server, you can use it to download directly into your software by using this link: https://usradioguy.com/NOAA/M2.3_tle.txt
https://usradioguy.com/NOAA/M2.4_tle.txt
I have more details and links on my page here: https://usradioguy.com/noaa-apt-reception/#meteor
Cees van der Laan has compiled a 39-page guide to building a Meteor M 2-3 GIS reception system. In an illustrated PDF document, he describes in detail the hardware and software required and takes you carefully through all the installation steps.
The Document, “Install_Manual_MeteorGIS” can be downloaded here: https://leshamilton.co.uk/CeesMeteorGIS.htm
Les Hamiltons MeteorGIS Installer is listed below in the software section.
More information can be found here as well https://github.com/happysat/Setup-Meteor-M-N2-N2-2-with-LRPT-Decoder-and-MeteorGIS
Note on Map outlines in MeteorGIS
Deltas and Alphas need to be changed in your MeteorGIS .ini and LRPT_Decoder.ini files to reflect accurate coastline and border placements.
Alfa_M22=111.2
Delta_M22=-3.2
SOFTWARE FILES:
Here are mirrored copies of the software files used in the creation of these Meteor Images. If you know of more current versions please let me know.
- AMIGOS – https://usradioguy.com/software/AMIGOS.zip
- LRPT Decoder V 59 https://usradioguy.com/software/LRPT_Decoder_v59.zip NEW
- MANUAL LRPT Decoder V 59 – for manual post-processing https://usradioguy.com/software/LRPT_Decoder_Manual_V59.zip NEW
- LRPT Offline Decoder https://usradioguy.com/software/LRPT_OFFLINE_DECODER.zip
- DDE Tracking Client v1.2 https://usradioguy.com/software/ddetracker.zip
- MeteorGIS V2.25 including config tool and default.ini https://usradioguy.com/software/MeteorGIS_v2.25.zip
- Meteor Demodulator Plugin v2.3 https://usradioguy.com/software/meteor_2.3.zip
- Smooth Meteor https://usradioguy.com/software/smoothmeteor-setup.zip
- LRPT Image Processor https://usradioguy.com/software/LrptImageProcessor .zip
- Satellite Tracking programs – Orbitron (http://www.stoff.pl) or WXTrack (http://www.satsignal.eu/software/wxtrack.htm).
- If you’re looking for an “all-in-one” solution, try Les Hamilton’s Meteor GIS Suite, Note that you must install the package onto the root directory of your chosen drive, not in a subfolder. And of course, you will need to change your basic information to match your station.
- LRPT-RENAMER.bat File re-namer for M2_Man_LRPT_Decoder.exe file outputs to match MeteorGIS.exe requirements, instructions below. https://usradioguy.com/software/LRPT-RENAMER.zip
- SATDUMP https://github.com/SatDump/SatDump A generic satellite data processing software application. Note, this software is updated almost daily, I recommend using the latest Nightly Build!
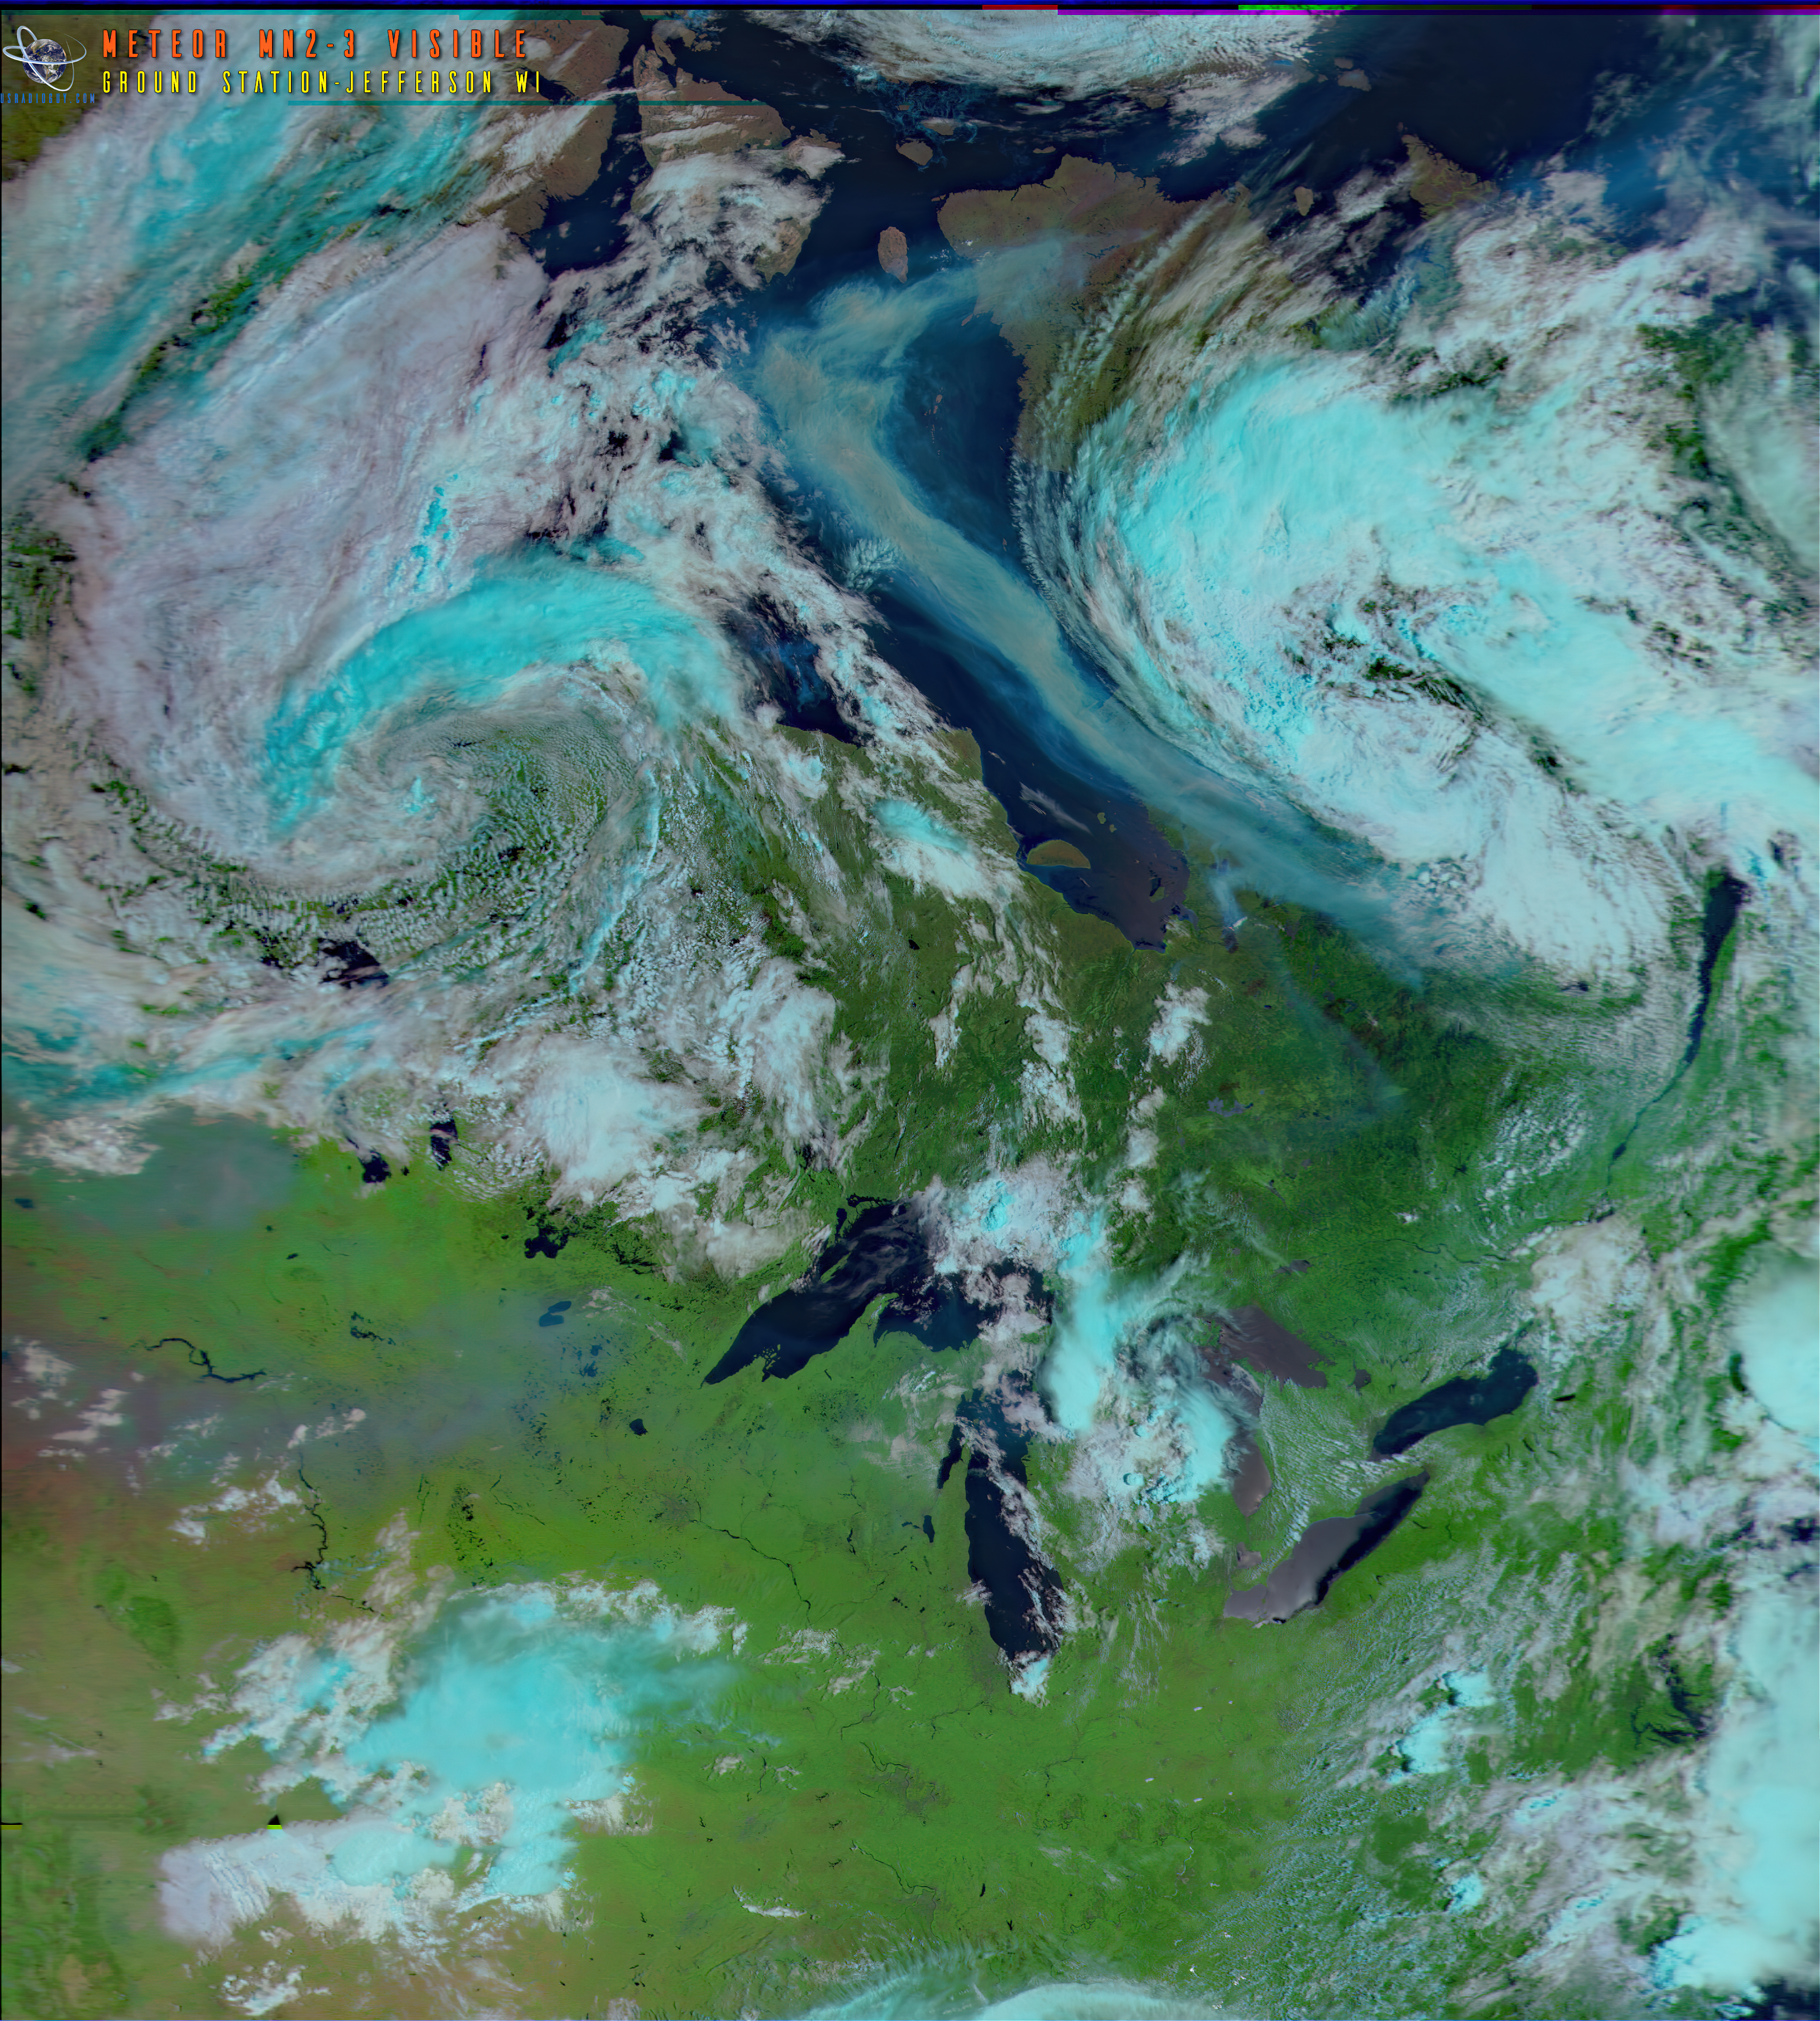
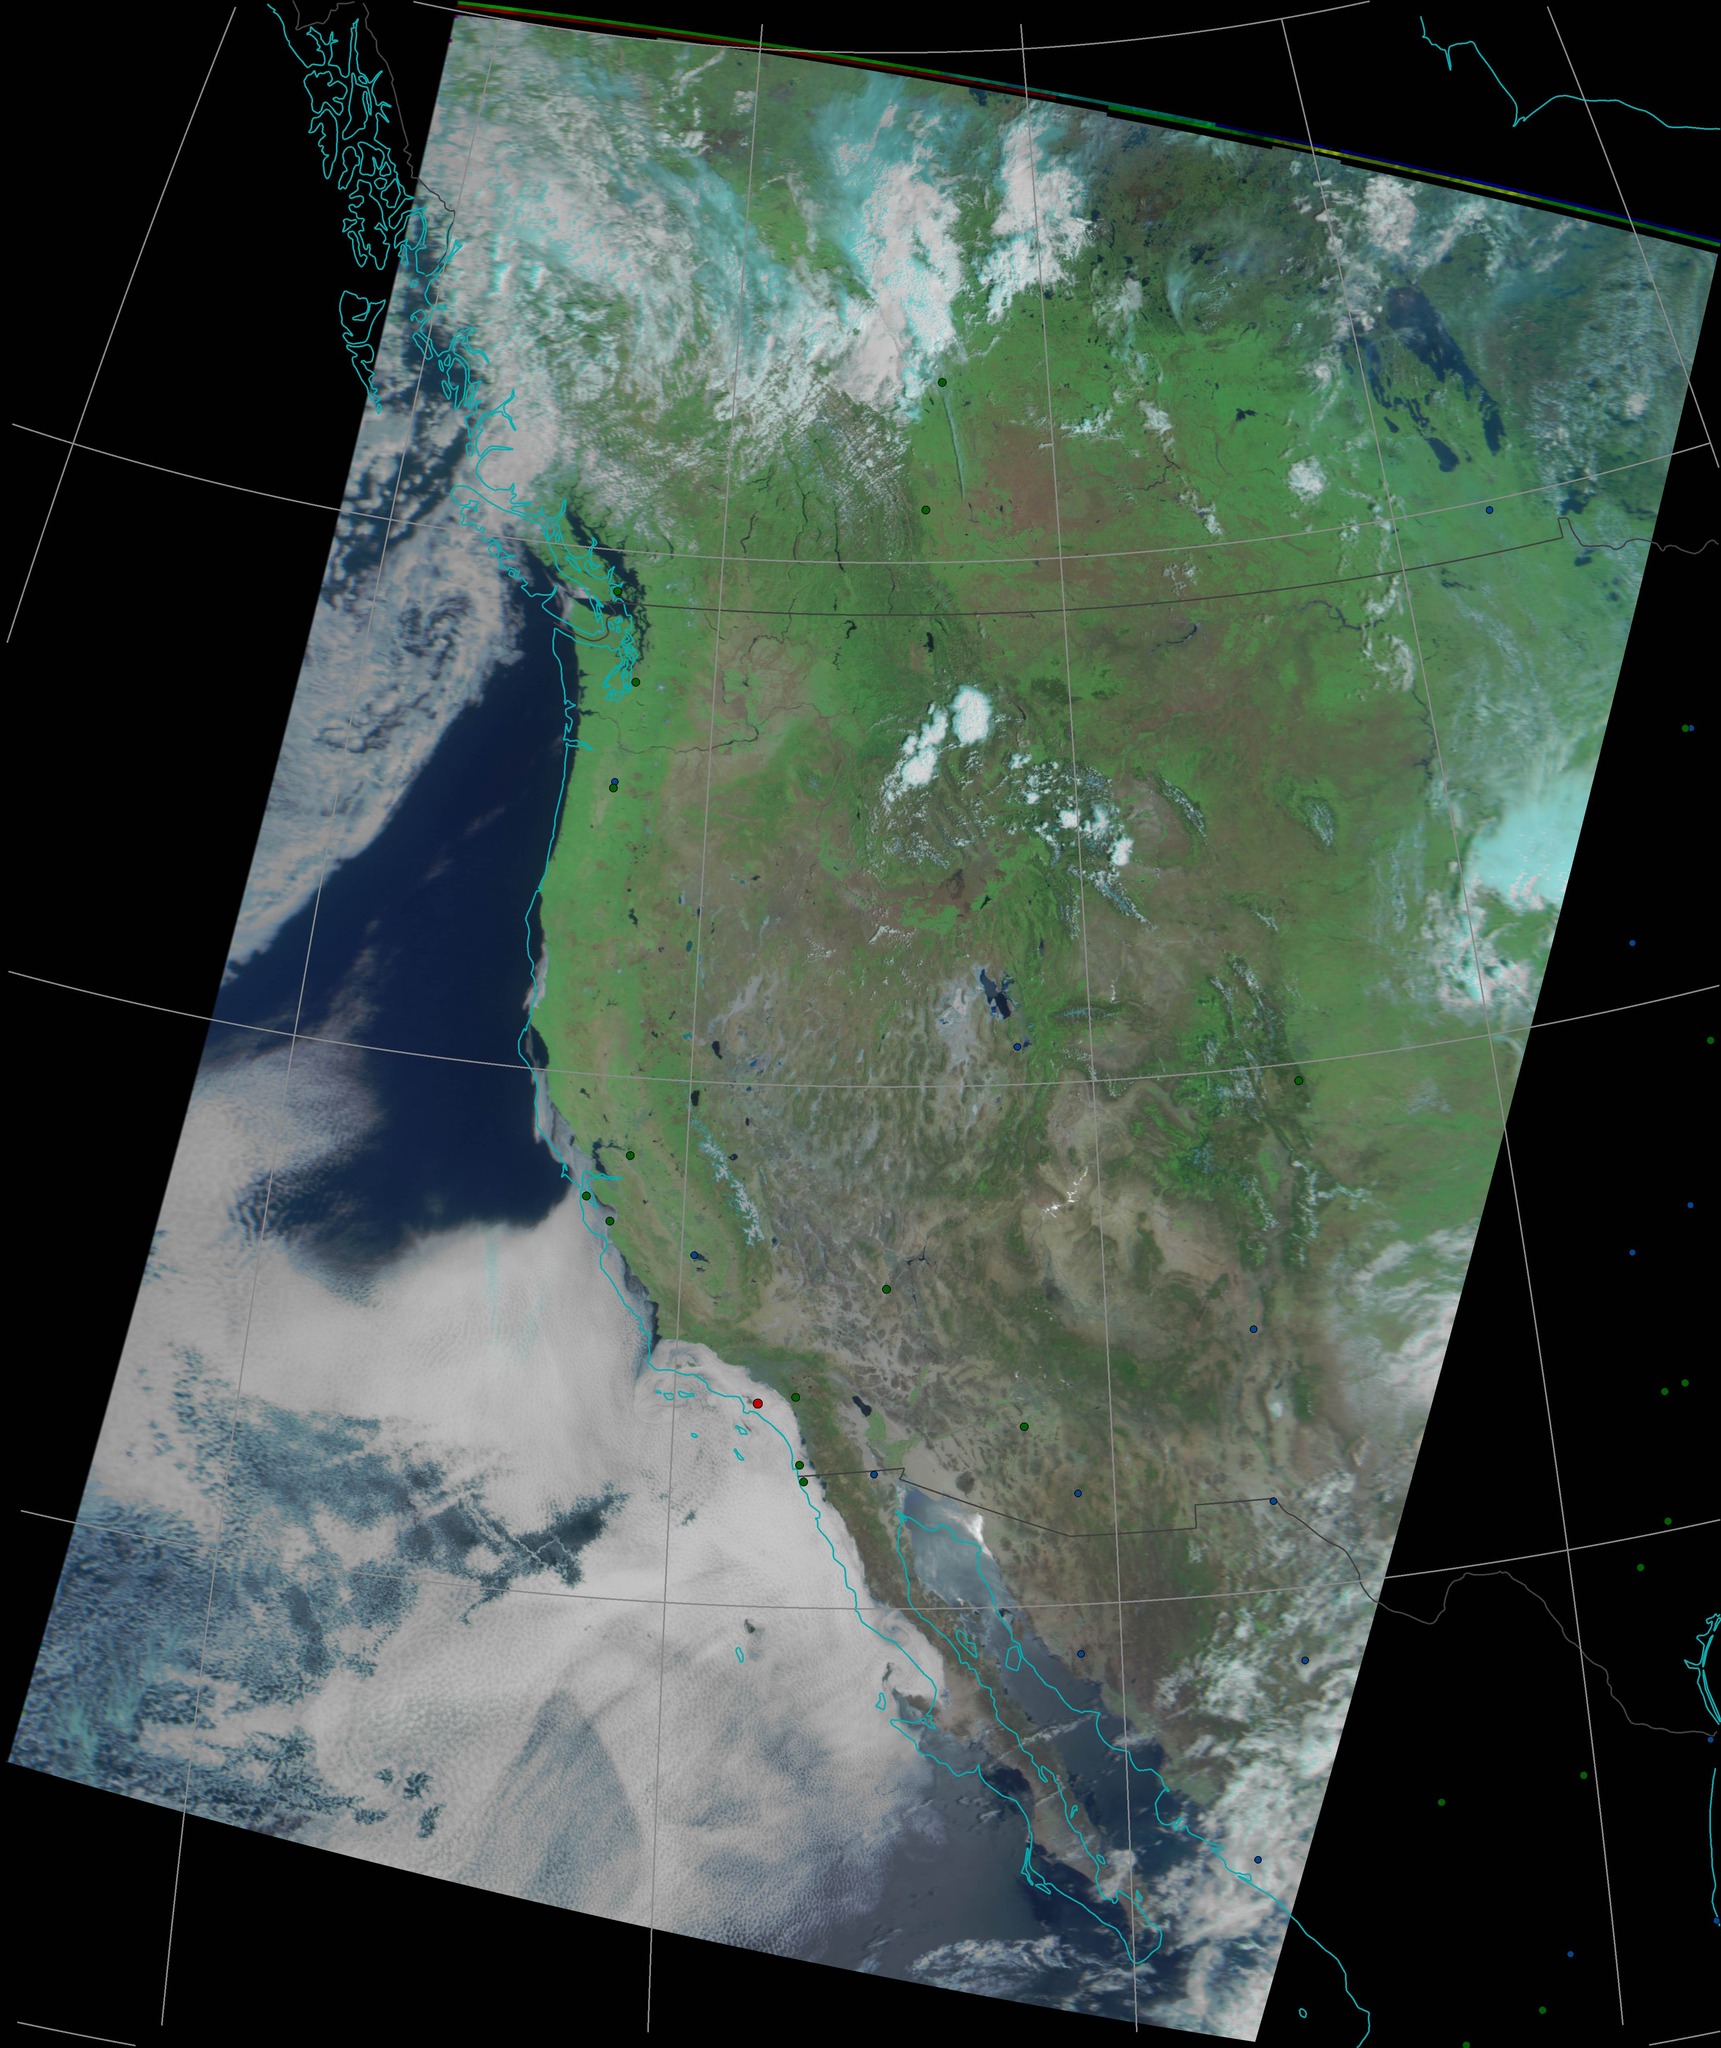
Click on the Image below, then zoom in to see LRPT imagery at high resolution 56mb

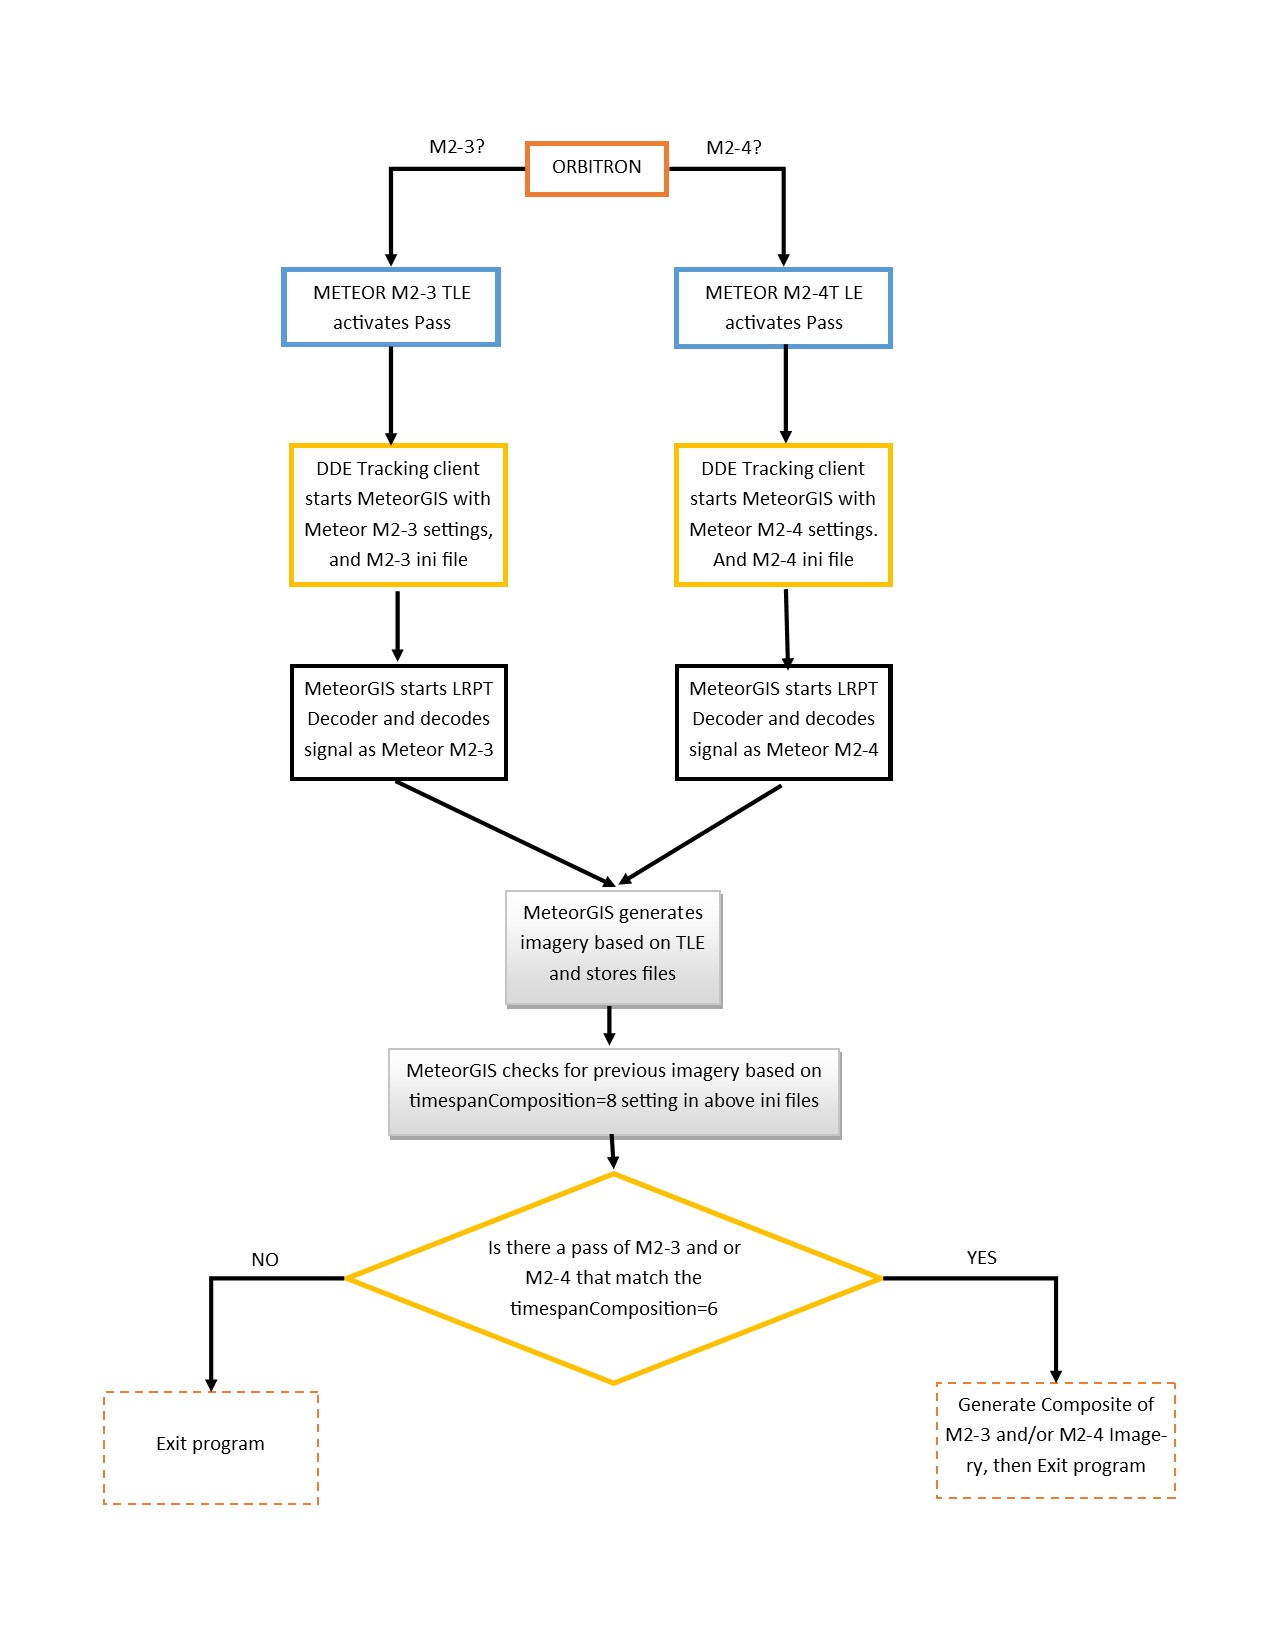
Note: Since Meteor MN2-4 has been in orbit, I have been running MeteorGIS with two separate Batch Files allowing capture and compositing of both Meteor M2-3 and Meteor M2-4 concurrently. The graphic below displays the basic methodology:
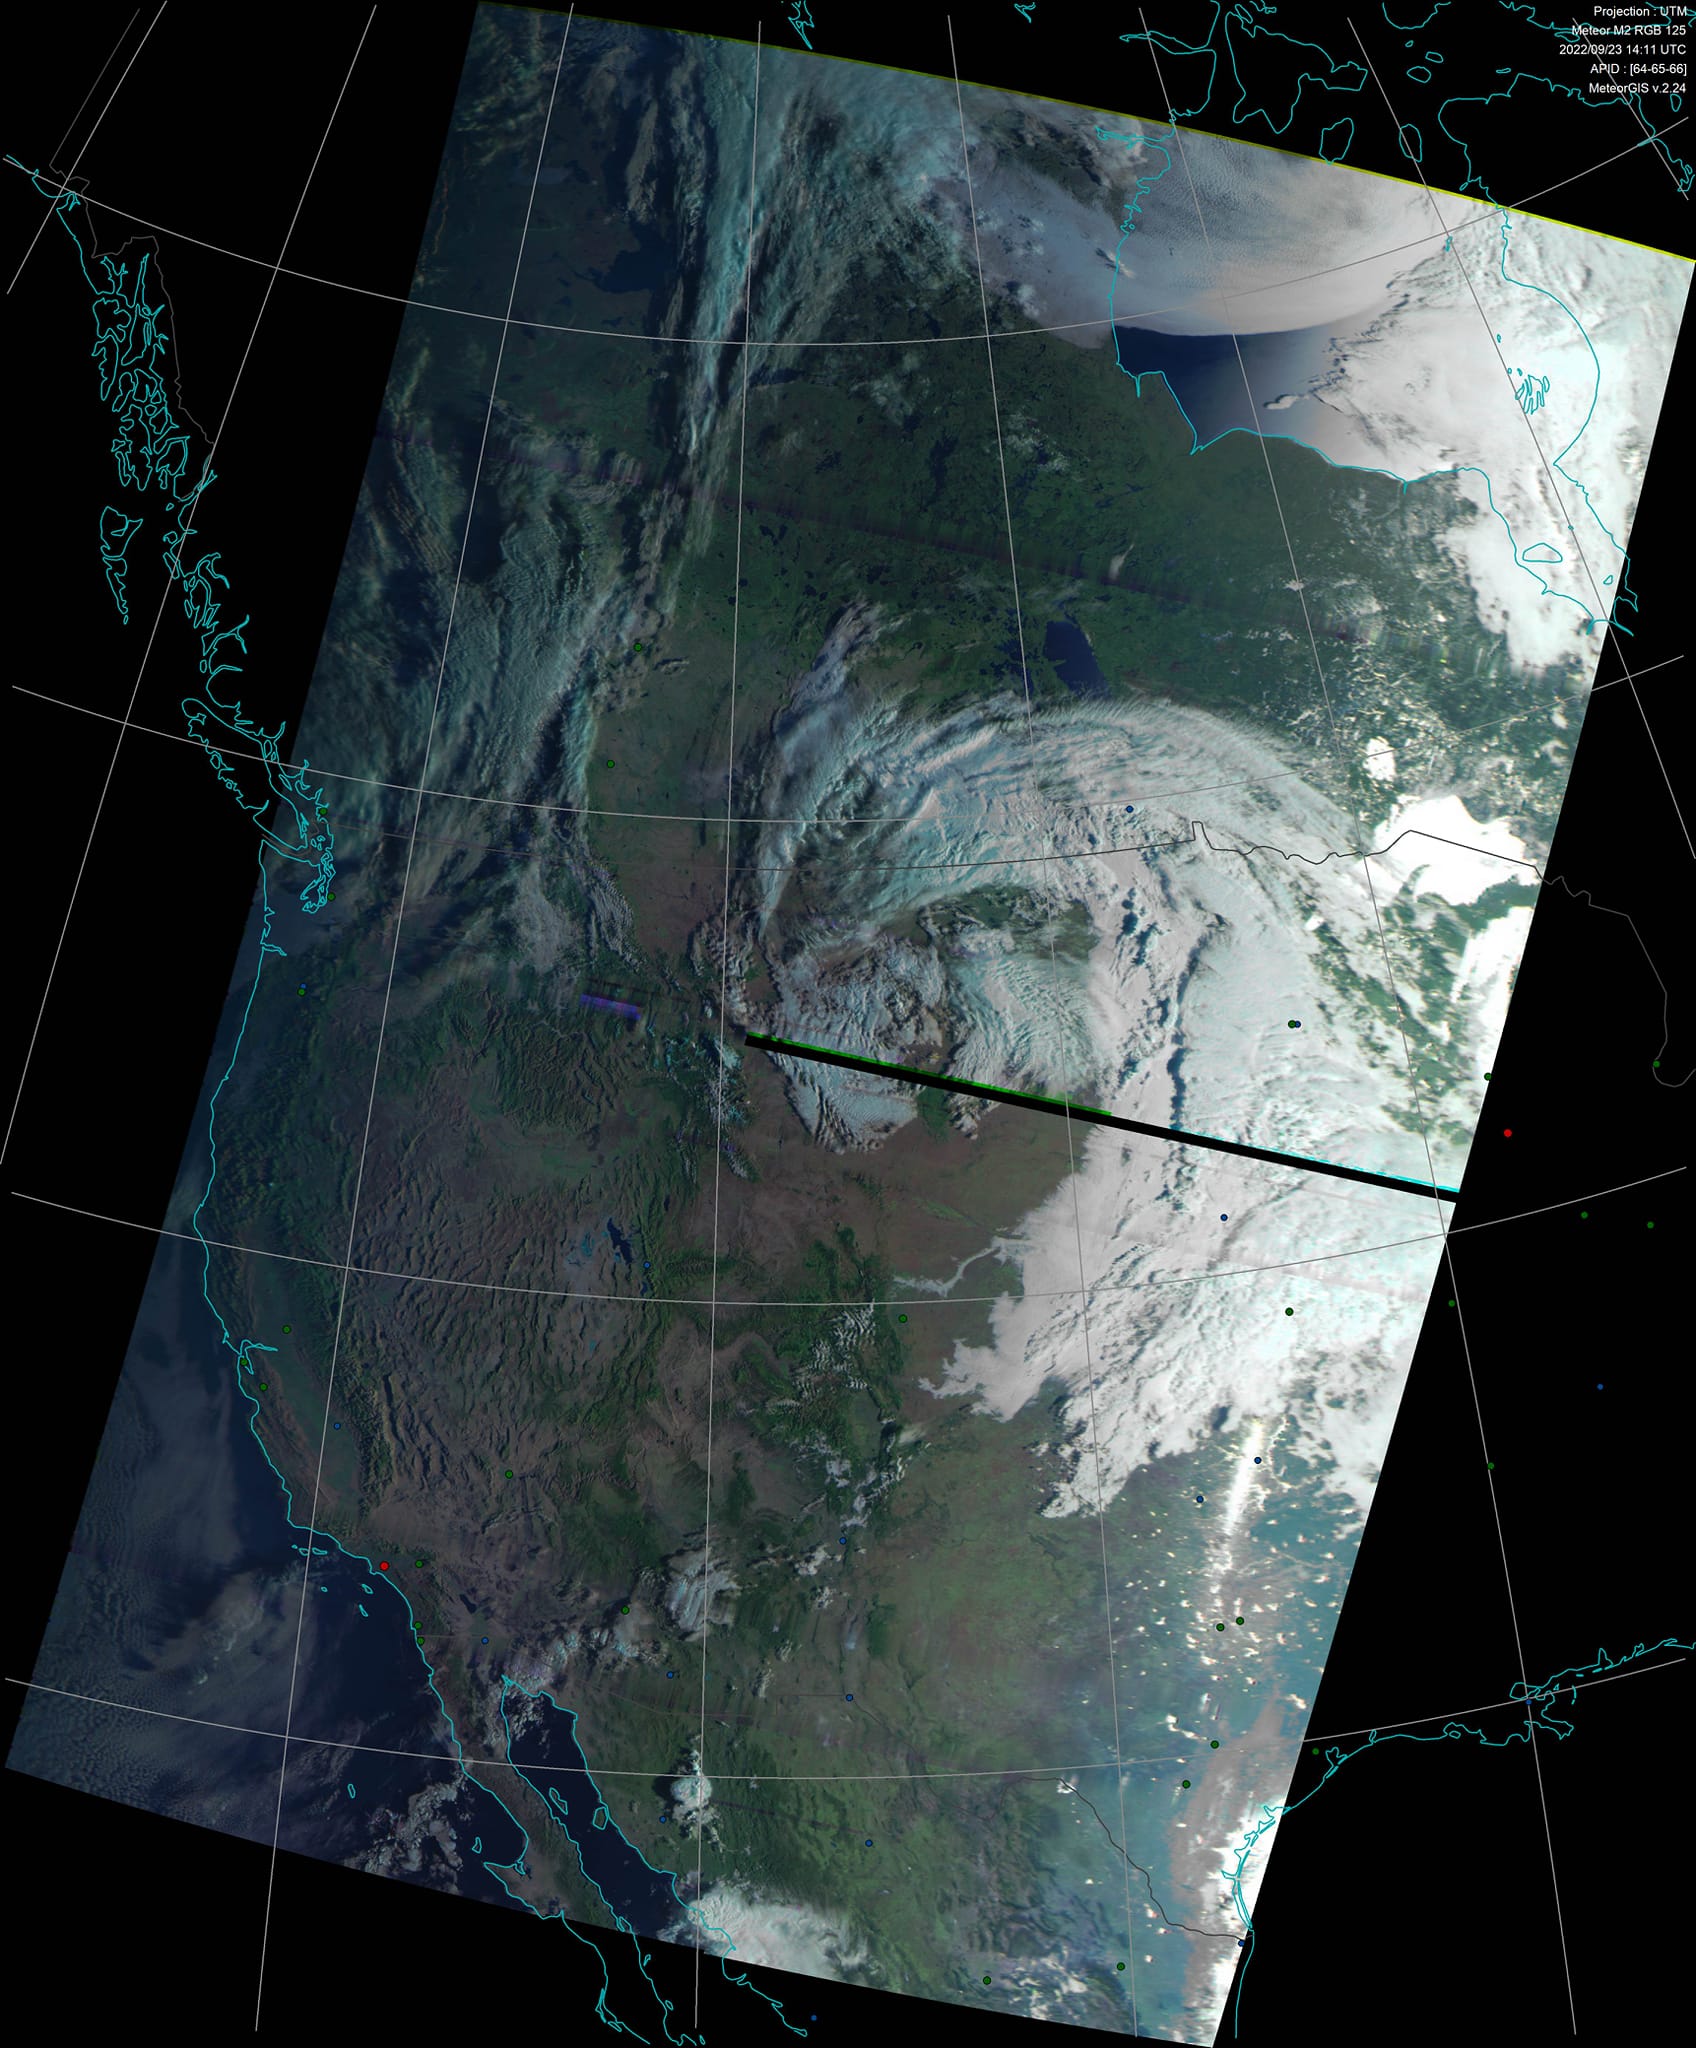
Example of how MeteorGIS can be used to “treat” an image by filling in lines in imagery
DDE Tracking Client Setup Information and Process.
In SDR# with DDE Tracking Client v1.2 under config I use these settings:
AOS
radio_Start
radio_modulation_type<wfm>
radio_center_frequency_Hz<137900000>
radio_frequency_Hz<137900000>
radio_bandwidth_Hz<120000>
PSK_set_SymbolRate<Auto>
PSK_socket_Enable
M2_decoder_init_Line<rgb=456.jpg>
M2_decoder_init_Line<RoughStartTimeUTC=now>
OQPSK_demodulator_Start
send_tracking_frequency_On
start_programm_Path<C:\Meteor\MeteorGIS.exe>
LOS
send_tracking_frequency_Off
start_programm_Path<C:\MeteorDemod\MeteorDemodwSatDump.bat>
radio_Stop
OQPSK_demodulator_Stop
PSK_socket_Disable
DDE TRACKING Scheduler
UPDATED 01-02-2025
The DDE TRACKING Scheduler receives satellite position data from satellite tracking programs (such as Orbitron). When a satellite appears in the recieving area or leaves the area, the scheduler executes a list of commands specified by the user to control SDR# and other plugins.
Tracking programs send the plugin the name of the satellite, its position, and frequency correction. If the name of the satellite is present in the scheduler and its elevation above the horizon exceeds the minimum elevation specified in the scheduler, the corresponding set of commands starts to execute.
When passing a name from a tracker to a plugin, some characters may be substituted and the name displayed in the plugin may not match the name displayed in the tracker. For example, a space may be replaced with an underscore. The name of the satellite in the scheduler settings must exactly match the name received from the tracker and displayed in the plugin window.
Wildcard characters are allowed in the satellite name. The following wildcard characters are supported:
[0-9]: Any character from the range.*: Any number of any characters.?: Any one character.
For example, you can create one set of commands for all METEOR or NOAA satellites by writing the name of the satellite as follows: (BUT REMEMBER, this could be problematic IF each Satellite is transmitting on Different Frequencies)
METEOR*METEOR-M2_[3456](MeteorMETEOR-M2_3,METEOR-M2_4,METEOR-M2_5,METEOR-M2_6)METEOR-M2_?
Commands executed when a satellite appears are added to the AOS window, and commands executed when a satellite leaves the area are added to the LOS window.
The Available Commands window displays all available commands. The << buttons are used to add the selected command from the Available commands window to the corresponding scheduler window. The spelling and correctness of commands are not checked when added, only when executed.
I recommend that after setting up the scheduler, you check the correctness of the commands using the satellite passage emulation mode in the satellite tracker app.
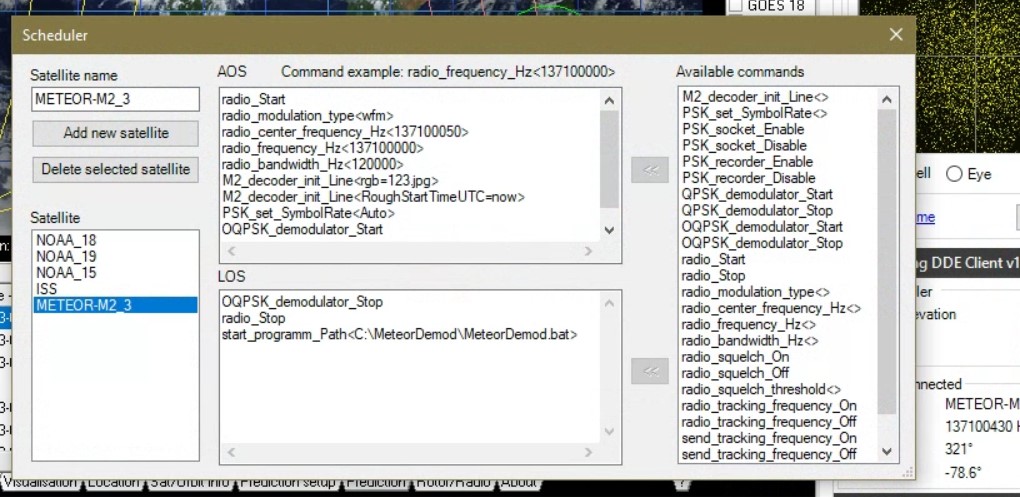
An example of the scheduler settings for receiving the Meteor-M2-3 spacecraft:
Consider the actions of the scheduler in accordance with the example above.
AOS
- When a satellite appears, (based on triggers from, in most cases a driver that is enabled from a tracking client such as Obitron) commands from the AOS window are executed.
- If SDR# has been stopped, the first thing to do is start receiving radio_Start .
- Next, set the modulation type radio_modulation_type<wfm>
- Set the center frequency and receive frequencies – radio_center_frequency_Hz<137100000> radio_frequency_Hz<137100000>.
- Next, set the signal bandwidth to radio_bandwidth_Hz<125000>. With these commands, SDR# is started and tuned the reception to the satellite frequency and signal bandwidth needed. Important – the order of execution of commands for setting up the radio matters. In the window of available commands, they are arranged in the correct order from top to bottom.
- Next up is the LRPT Decoder settings, M2_decoder_init_Line<rgb=123> and M2_decoder_init_Line<RoughStartTimeUTC=now> these tell the LRPT Decoder to set the rbg (color) to 123 (daylight) and to use the current UTC for the decode.
- Next in the scheduler are commands for setting up and running the demodulator plugin. PSK_set_SymbolRate<Auto> – setting the signal symbol rate to Auto.
- PSK_socket_Enable This is a “fix” for those who have issues with the LRPT_Decoder hanging or running too slowly. Forces the TCP packets through on port 2011.
- OQPSK_demodulator_Start – start the demodulator plugin. OQPSK (offset quadrature phase shift keying).
- The send_tracking_frequency_On command.
Looking at this in more detail: Two similar commands are available in the scheduler – send_tracking_frequency_On – turns on sending satellite frequency correction to other plugins and radio_tracking_frequency_On turns on tuner frequency tuning. To receive Meteors, you cannot turn on the tuning of the tuner reception frequency. When the tuner frequency is changed, the phase synchronization of the signal at the reception is lost, and the plug-in for demodulating the signal from the Meteor itself performs frequency adjustment and for this, it needs to send correction data using the send_tracking_frequency_On command. - And finally, we launch the external program decoder start_programm_Path. this is where your executable is start_programm_Path<C:\Meteor\MeteorGIS.exe>
LOS
When the satellite goes below the Minimal elevation parameter set in the Tracking DDEClient, the execution of commands from the LOS window begins –
- OQPSK_demodulator_Stop stops the signal demodulator
- send_tracking_frequency_Off disables sending frequency corrections, and,
- if necessary, radio_Stop stops receiving.
Demodulator – performs phase and symbol rate synchronization with the signal from satellites from the Meteor-M series and saves the final signal in 8-bit soft format to a file or outputs it to a TCP port for further decoding.
Demodulator – checkbox for launching the demodulator. Frequency – Displays the frequency of the plugin’s phase lock. During the search for a satellite signal, this frequency is constantly changing within certain limits. When a signal is acquired from a satellite, the Locked indicator lights up and this parameter displays the carrier frequency of the signal. Modulation type – select OQPSK modulation. The current satellites of the Meteor-M series use OQPSK modulation, SymbolRate – symbol rate, 72K or 80K or AUTO.
Tracking – enable the initial frequency adjustment by correction from the tracker for faster acquisition of the satellite carrier. Tuning works only in conjunction with the scheduler and if the transfer of corrections to plugins is enabled. This setting is only meaningful if there is no carrier lock. After capturing the synchronization, the correction according to the data from the tracker is not carried out. The Frequency parameter shows the frequency received from the tracker, Error shows the difference between the frequency received from the tracker and the frequency captured by the phase adjustment. The Correct parameter shows the correction value for the plug-in phase adjustment.
Output – select a device for signal output. To a file or to a TCP port, or both to a file and a port. Connected displays the number of connected clients on the TCP port. Dropped data – the number of lost buffers, under normal conditions this parameter should always be equal to zero, but if the computer speed is not enough for the plugin to work, the number of buffers lost inside the plugin will be displayed.
LRPT Decoder
This is my ini file for LRPT_Decoder:
[IN]
sat=auto
source=TCP
mode=auto
host=localhost
port=2011
[OUT]
rgb=no
rgb_q=100
mono=yes
logs=yes
APID70=yes
VCDU=yes
path=C:\Meteor\images\M2\2023\06
pathM22=C:\Meteor\images\M22\2023\06
[GLOB]
AmigoID= _(Your unique number will appear here after the first connection to the server)
mode=UDP
path=C:\AMIGOS\ShareFolder
host=185.26.115.106
port=2013
[GEO]
RoughStartTimeUTC=6/30/2023
TleFileName=C:\AMIGOS\M2.2_tle.txt
Alfa_M2=110.8
Delta_M2=32
Alfa_M22=111.2
Delta_M22=-3.2
[FAST]
FORMAT=jpg
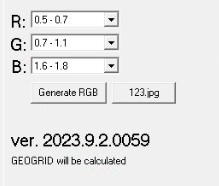
R=1
G=2
B=3M2_LRPT_Decoder Version 59
- The stability of the processing has been improved: The decoder is now more likely to produce stable results, even when there are errors in the input data.
- The procedure for generating RGB and calculating GEO in the error-handling block has been improved. Now, the decoder’s processing is considered unfinished until the GEO calculation is completed.: This means that the decoder will now wait until the GEO calculation is finished before generating the RGB values. This helps to prevent errors and produce more accurate results.
- Exception errors fixed: Some errors that were previously causing the decoder to crash have been fixed.
- AutoClose=yes by default: This means that the decoder will now automatically close when it is finished decoding. This can be helpful for saving resources and preventing memory leaks.
- 80K is much more stable: The decoder is now more stable than before. This means that it is less likely to crash or produce unexpected results.
- Overall, these changes make the decoder more reliable and easier to use.
V59 Software can be downloaded above, or here:
LRPT Decoder V 59 https://usradioguy.com/software/LRPT_Decoder_v59.zip NEW VERSION
Installation:
- Download the executable above. Extract the file.
- Rename your existing M2_LRPT_Decoder.exe to M2_LRPT_DecoderV56.exe (just tosave the old version)
- Copy and paste the new M2_LRPT_Decoder.exe into the SAME folder as the old one using the same file name, M2_LRPT_Decoder.exe.
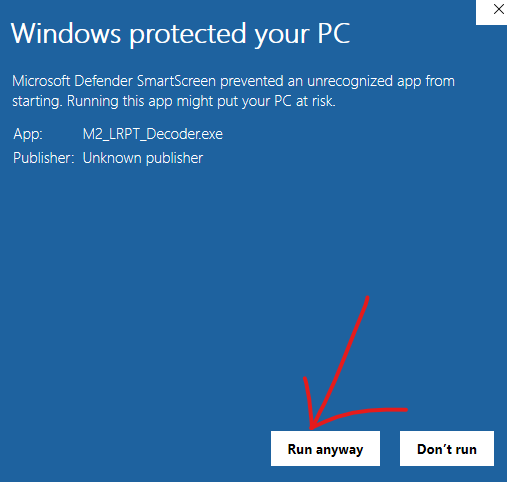
- Double-click on the new M2_LRPT_Decoder.exe so that you can allow Windows Defender or your antivirus to get past the opening Windows warning, click “Run Anyway” to allow M2_LRPT_Decoder.exe to open then close it after it first opens, then you are good to go!
MANUAL LRPT Decoder V 59 – for manual post-processing of soft .s files https://usradioguy.com/software/LRPT_Decoder_Manual_V59.zip NEW details for use are in the zipped archive.
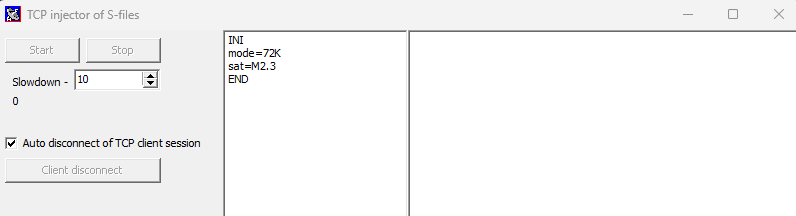
Included in the zip file is TCP_Injector.exe is a debugging tool and is not required in everyday decoding. It can be helpful for offline decoding as well
To use TCP Injector:
– Start Injector BEFORE starting M2-Decoder
– Then start M2-Decoder in TCP mode.
– In TCP_Injector.exe select either 72K or 80K
– Then click button start in TCP_Injector.exe and choose the s-file to be decoded.
You can regulate the speed of the data rate with the slowdown value
The value is a pause in milliseconds between data packets.
The injector cannot emulate real-time absolutely (with data timing) because Vasiliy’s Meteor Demodulator plugin does not save data in the file when “Lock” is absent.
Footnotes:
- Sun-synchronous polar orbit: An orbit that passes over the same point on Earth at the same time each day. This allows the satellite to image the entire Earth every 24 hours.
- Low-Resolution Picture Transmission (LRPT): A data format used to transmit weather images from satellites.
- High-Resolution Picture Transmission (HRPT): A data format used to transmit weather images from satellites.
- NOAA APT: A data format used to transmit weather images from NOAA satellites. APT images are typically 1024×1024 pixels and have a resolution of about 1 kilometer per pixel.
- Technical faults: Any problems with the satellite’s hardware or software that can prevent it from operating as designed.
- Micrometeorite collisions: The impact of small, meteor-like objects with the satellite’s surface. These impacts can damage the satellite’s exterior and internal components.
- Soyuz-2: A Russian launch vehicle that is capable of placing satellites into a variety of orbits.
- SDR: A software-defined radio is a radio receiver that uses software to control the receiver’s components. This allows the receiver to be configured to receive a wide variety of radio signals, including those used by satellites.
Processing older, past Meteor Imagery Tip: LRPT-RENAMER.bat
When using M2_Man_LRPT_Decoder.exe to process a stored .s fil it is important to remember this one important aspect of the software. M2_Man_LRPT_Decoder.exe and MeteorGIS.exe were written by two separate folks, and as such the output of M2_Man_LRPT_Decoder.exe is NOT what MeteorGIS.exe expects as a naming convention:
023-07-25-22-32-07.s-67.bmp is what MeteorGIS expects, but M2_Man_LRPT_Decoder outputs this:
2023_07_25_LRPT_22-32-07.s_67.bmp
Two different naming conventions. The solution is to rename every file with _ and – and _LRPT- to just dashes, time-consuming and tedious!
So I wrote a WINDOWS batch file that does it all in about 1 second and from just the click of the mouse.
To use it, download the file https://usradioguy.com/software/LRPT-RENAMER.zip , extract the file, and place it in the SAME folder as your M2_Man_LRPT_Decoder.exe places its geocoding results.
To run, simply click the LRPT-RENAMER.bat, and it will automatically rename all the files with the old naming convention to the new naming convention MeteorGIS requires and then, open the folder for your use.
For more information on reprocessing older LRPT imager see Les Hamilton’s Page
Using MeteorDemod with Orbitron and SDR# to automatically decode passes.
Currently, one of the popular ways to receive and decode Meteor LRPT imagery is with MeteorGIS and M2_LRPT_Decoder. I still continue to use it. I was made aware of another Meteor Decoder that had previously run only under LINUX or with a virtual machine. Recently after discussions with the author of MeteorDemod he ported his software to run in a Windows environment. https://github.com/Digitelektro/MeteorDemod
I took up the challenge to evaluate and test the software. Like many other tools, this one runs with a command line argument that specifies what the software should do, and where to find the files it needs.
After installing MeteorDemod, go into the folder you have the executable in and look for the ‘resources’ folder, open it up, and edit the settings.ini file, Usually all that is needed to get started is your correct location.
Using a wav file from a baseband recording:
meteordemod -m oqpsk -int 1 -diff 1 -s 80e3 -sat METEOR-M-2-3 -i input_baseband.wav -t weather.tle -o ./OR
Using an .s file generated by Meteor Demodulator in SDR#:
meteordemod -m oqpsk -int 1 -diff 1 -s 80e3 -sat METEOR-M-2-3 -i 2023_07_23_LRPT_23-20-46.s -t weather.tle -o ./Now, typing that out for every pass could be cumbersome, so you could write up a simple batch (.bat) and with one or two changes make the string work in windows, such as:
"C:\Program Files (x86)\meteordemod\meteordemod.exe" -m oqpsk -int 1 -d 23-07-203 -f jpg -diff 1 -s 80e3 -sat METEOR-M-2-3 -i “C:\pathtoyourfiles\2023_07_23_LRPT_23-20-46.s " -t " C:\pathtoyourtle \M2.3_tle.txt" -o “C:\pathtoyouroutput\ Meteor_M2-3"Save it as a batch file and before running update the date and the name of the .wav and/or .s file.
Run the program and it will generate the images based on the command line, and what you have edited in the settings.ini file of MeterDemod executable folder.
That works, but still does not run automatically after a pass of the Meteor satellite. So what to do? Write a bigger Batch File!
This Batch file, is designed to be located in the directory C:/MeteorDemod/, after editing with your specific folder locations does the following:
- Sets the variable for your drive letter and location of SDR DDE Tracking Client location of .s files (or baseband files).
- Uses Windows Powershell Invoke Webrequest Command to download the most current Meteor 2-3 TLE and save it in the appropriate directory.
- Calculate the needed time Variable in UTC Date and Hours as variables
- Calculate the latest .s file in the recordings folder and pass that to a variable
- Check the latest file AND if it is under 1kb, skip all processing and exit the batch file.
- Run the MeterDemod executable to generate imagery. Note: It will run first under 80K, and if the recorded file is not 80K it will then attempt processing at 72K.
- Open the file directory where images are stored for review.
echo off
:: Set Drive letter below
	Set drive=C
:: Set folder location of .s files
	Set Sfileloc=:\Meteor\RecordedFiles\

:: Get Current TLE
	powershell -Command Invoke-WebRequest https://celestrak.com/NORAD/elements/gp.php?CATNR=57166 -OutFile %drive%:\MeteorDemod\M2.3_tle.txt
::Get UTC times:
	for /f %%a in ('wmic Path Win32_UTCTime get Year^,Month^,Day^,Hour^,Minute^,Second /Format:List ^| findstr "="') do (set %%a)
	Set Second=0%Second%
	Set Second=%Second:~-2%
	Set Minute=0%Minute%
	Set Minute=%Minute:~-2%
	Set Hour=0%Hour%
	Set Hour=%Hour:~-2%
	Set Day=0%Day%
	Set Day=%Day:~-2%
	Set Month=0%Month%
	Set Month=%Month:~-2%
	set UTCTIME=%Hour%%Minute%%Second%
	set UTCTIME:=%Hour%:%Minute%:%Second%
	set UTCDATE=%Year%%Month%%Day%
	set UTCTIMEANDDATE=%UTCDATE%.%UTCTIME:%
	echo %Day%
	echo %Month%
	echo %Year%
	echo Drive is %drive%
	echo S file location is %Sfileloc%
:: Apply VARIABLE to  Most Current .s file from Meteor 2-3
cd "%drive%:\Meteor\RecordedFiles\"
for /f %%i in ('dir /b/a-d/od/t:c') do set meteor=%%i

echo The most recently created file is %meteor%

cd "%drive%:\MeteorDemod\"

:: Check file size before processing
for %%F in ("%drive%%Sfileloc%%meteor%") do (
    if %%~zF LSS 1024 (
        echo Skipping file: %%~nxF
        goto SkipProcessing
    )
)

::Process with MeteorDemod

::80K
"C:\Program Files (x86)\meteordemod\meteordemod.exe" -m oqpsk -int 1 -d %Day%-%Month%-%Year% -f jpg -diff 1 -s 80e3 -sat METEOR-M-2-3 -i "%drive%%Sfileloc%%meteor%" -t "%drive%:\MeteorDemod\M2.3_tle.txt"  -o "%drive%:\MeteorDemod\Meteor_M2-3"

::72K
"C:\Program Files (x86)\meteordemod\meteordemod.exe" -m oqpsk -d %Day%-%Month%-%Year% -f jpg -diff 1 -sat METEOR-M-2-3 -i "%drive%%Sfileloc%%meteor%" -t "%drive%:\MeteorDemod\M2.3_tle.txt"  -o "%drive%:\MeteorDemod\Meteor_M2-3"

explorer.exe /root,%drive%:\MeteorDemod\Meteor_M2-3\
exit
:SkipProcessing
ECHO Exiting Program, file size under 1KB
REM Add a time delay of 5 seconds
timeout /T 5 /NOBREAK
exit
Now how to run it automatically? Well, that is the simple part. Going into SDR# and the DDETracker Settings and adding the command to the LOS section of your Meteor2-3 Section
start_programm_Path<C:\MeteorDemod\MeteorDemod.bat>
You need to add it to the LOS as the software needs a complete . s file or baseband to process.
Meteor Satellite No. 2-4
[wpcdt-countdown id=”5887″]
The Meteor Satellite No. 2-4, Launched February 29th of 2024. Meteor No. 2-5 and No. 2-6 are already in production. In the future, they will also replace in-orbit satellites that are approaching the end of their active life.
Scheduled Meteor Launches
| Year | UTC Date (Format: DDD:HH:MM:SS:MS) | Satellite(s) | Designation | Additional Vehicles | Rocket/Upper stage | Payload Fairing | Cosmodrome (Site/Pad) | Remarks |
|---|---|---|---|---|---|---|---|---|
| 2023 | June 27 (178:11:34:09.010) | Meteor | M №2-3 | 42 Multiple small s ats | Soyuz 2-1B/Fregat | M (B15000003/14202) | Vostochniy, 1S | On Orbit LRPT and HRPT |
| Cube-SX-HSE-3, StratoSat TK-1, UmKA-1, Nanozond-1, UTMN-2, KuzGTU-1, ReshUCube-2, Akhmat-1, Vizard-meteo, Svyatobor-1), Polytech Universe 3, SPbPU ultra-small artificial satellite for space exploration, Bureau 1440 technology demonstrator, ArcCube-01, Don-01. | ||||||||
| 2024 | February 29 (335:05:43:xx.xxx) | Meteor | M №2-4 | Pars-1, 16 SITRO-AIS, Zorky-2M N°2, and the Marafon-D | Soyuz 2-1B/Fregat | M (x15000xxx/14203) | Vostochniy, 1S | LRPT and HRPT |
| 2025 | NET Q4 (xxx:xx:xx:xx.xxx) | Meteor | M №2-5 | multiple small sats | Soyuz 2-1B/Fregat | M (x15000xxx/14205 | Vostochniy, 1S | LRPT and HRPT |
| 2026 | NET Q3 (xxx:xx:xx:xx.xxx) | Meteor | M №2-6 | multiple small sats | Soyuz 2-1B/Fregat | M (x15000xxx/xxxxxx | Vostochniy, 1S | LRPT and HRPT |
| 2030 | TBD (xxx:xx:xx:xx.xxx) | Meteor | MP №1 | unk | Soyuz 2-1B/Fregat | M (x15000xxx/xxxxxx | Vostochniy, 1S | X-Band |
| 2030 | TBD (xxx:xx:xx:xx.xxx) | Meteor | MP №2 | unk | Soyuz 2-1B/Fregat | M (x15000xxx/xxxxxx | Vostochniy, 1S | X-Band |
| 2030 | TBD (xxx:xx:xx:xx.xxx) | Meteor | MP №3 | unk | Soyuz 2-1B/Fregat | M (x15000xxx/xxxxxx | Vostochniy, 1S | X-Band |
| 2030 | TBD (xxx:xx:xx:xx.xxx) | Meteor | MP №4 | unk | Soyuz 2-1B/Fregat | M (x15000xxx/xxxxxx | Vostochniy, 1S | X-Band |
| 2030 | TBD (xxx:xx:xx:xx.xxx) | Meteor | MP №5 | unk | Soyuz 2-1B/Fregat | M (x15000xxx/xxxxxx | Vostochniy, 1S | X-Band |
| TBD (xxx:xx:xx:xx.xxx) | Meteor | M №3 (Ocean) | unk | Soyuz 2-1B/Fregat | M (x/x) | Vostochniy, 1S | X-Band |
IR Issues with MeteorGIS 2.24 and 2.25
Currently, Meteor M2-3 is transmitting on channels 1,2,4 (APID 64,65, and 67) However, even though the M2_LRPT_Decoder v59 decodes the imagery to the correct channels, MeteorGIS does not process the images correctly. This is because the first two Meteors, M2 and M2-2 used bands 1,2,5 (APID 64,65, and 68) and the software was set to use those channels. When MeteorGIS processes the decoded images that M2_LRPT_Decoder v59 outputs, MeteorGIS processes band 4 incorrectly. The temperature scale is higher by as much as 30° -50° degrees F.
So, how do we correct for this? Well, the first best option is to correct the software. The author of the software has been contacted and will hopefully be able to make the needed changes. But until that is done, the next option is to ‘cheat’, that is, fool MeteorGIS into thinking it is using the correct channels.
Running MeteorGIS in automatic mode with Channel 124 selected will result in the incorrect original yellow thermal image and a strange-looking visual image. To get the correct imagery, it is necessary to rename some of the files.
Rename the Channel 4 filenames in your images folder from ….67.bmp and ….67.stat to ….68.bmp and ….68.stat. I also changed the filenames from ….124 to ….125. Example below:
| Original 124, 67 output files | Edited 125, 68 files |
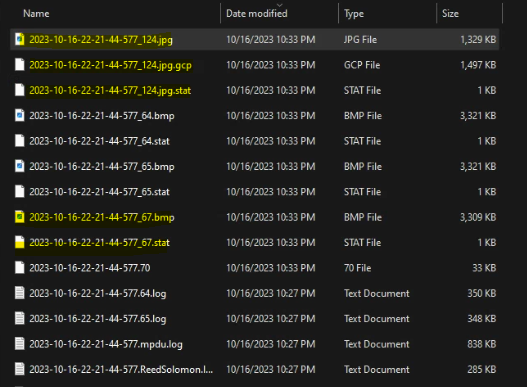 | 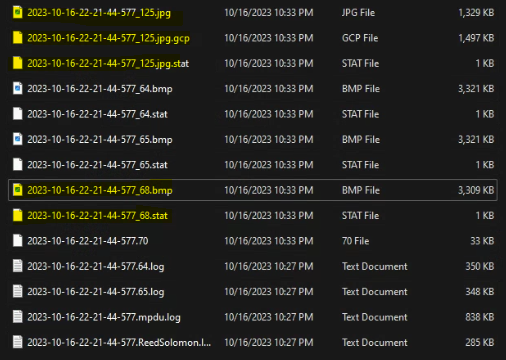 |
You will have to delete the original images from that pass in your final images folder before you run the manual outputs otherwise MeteorGIS will skip the files since they already exist.
Another option that I use is to simply use two separate folders just for this fix, c:/meteor/tempimages/ for the ‘corrected’ image files, and c:/meteor/tempfinalimages/ for the corrected final output files. Creating a new MeteorGIS.bat with a link to a tempdefault.ini file that specifies your folder structure both for input and output folders will make it easier to run.
Run your MeteorGIS.bat in manual mode again and you will get the corrected visual images.

I wrote a short batch file that automatically searches for the 124, and 67 files, and renames them all with just a click. ONLY use this in a temp folder for the file you wish to process, as it will overwrite all the files to the 125 and 68 file names. To use, extract the file to the folder you wish to change the names on, and then run the 125-68-RENAMER.bat file.
125-68-RENAMER.zip
What Happens during a test mode?
So, what happens during a TEST mode.
MSU-MR is essentially a modern version of the venerable AVHRR (NOAA), while having quite a different design, (It’s not a copy or clone).
It can scan 6 channels at the same time instead of 5 and is fully redundant (2 motors, 2 mirrors, 12 detectors).
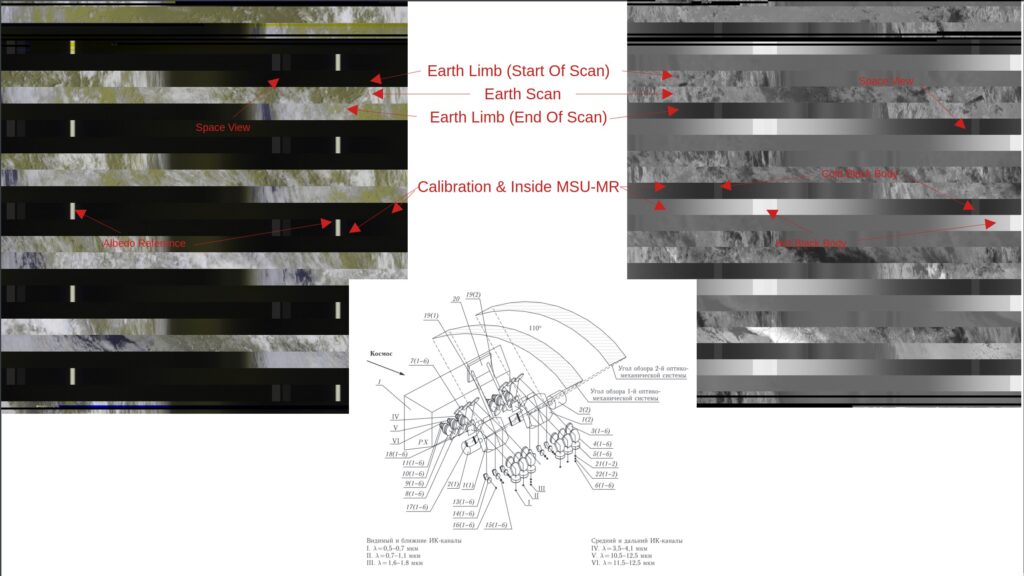
Test mode broadcasts part of the scanning mirror cycles that are normally cut off from view.
- The scan starts with a space look followed by an earth limb. Then you have the actual earth view (that you see in normal L/HRPT), followed by another limb.
- After that, you have a space look again, and then the mirror scans the INSIDE of the MSU-MR.
Why? Well, this enables the detectors to be calibrated.
- Compared to AVHRR which has a single black body calibrator for IR, MSU-MR has 2, a cold one (255K) and a hot one (313K). These are materialized by little gray/white squares. Each BB is stabilized in temperature by a heater.
- Additionally, MSU-MR has also an albedo calibrator for the visible channels. This is essentially a fancy incandescent bulb, similar to MODIS and many others.
AVHRR has no on-orbit capabilities for visible channel calibration.
The entire IR baseplate, at the left of the diagram, is kept (very!) cold by a passive radiant cooler at 75K.
This is cold enough to condense oxygen and nitrogen. That’s why MSU-MR needs some cleaning cycles when the image is blurry.
A cleaning cycle consists of switching on the baseplate heater permanently to heat it to approximately 40°C. During this time, IR detectors are inoperable, but visible channels still work.
I hope you found this explanation interesting! (Lego11 wrote this up and Aang254 provide the chart