
Layering Fire and Hotspot Data on Meteor Sat Imagery
Layering Fire and Hotspot Data on Meteor Sat Imagery
Adding Global Fire hotspot data to MeteorGIS 2.24
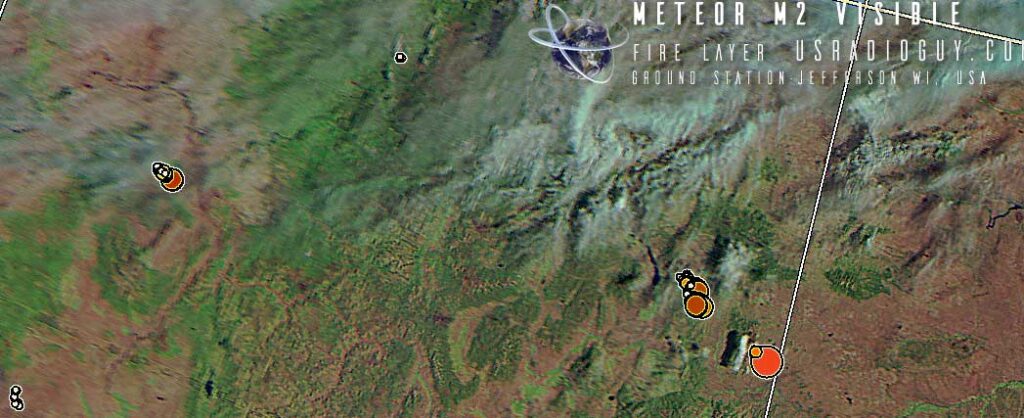
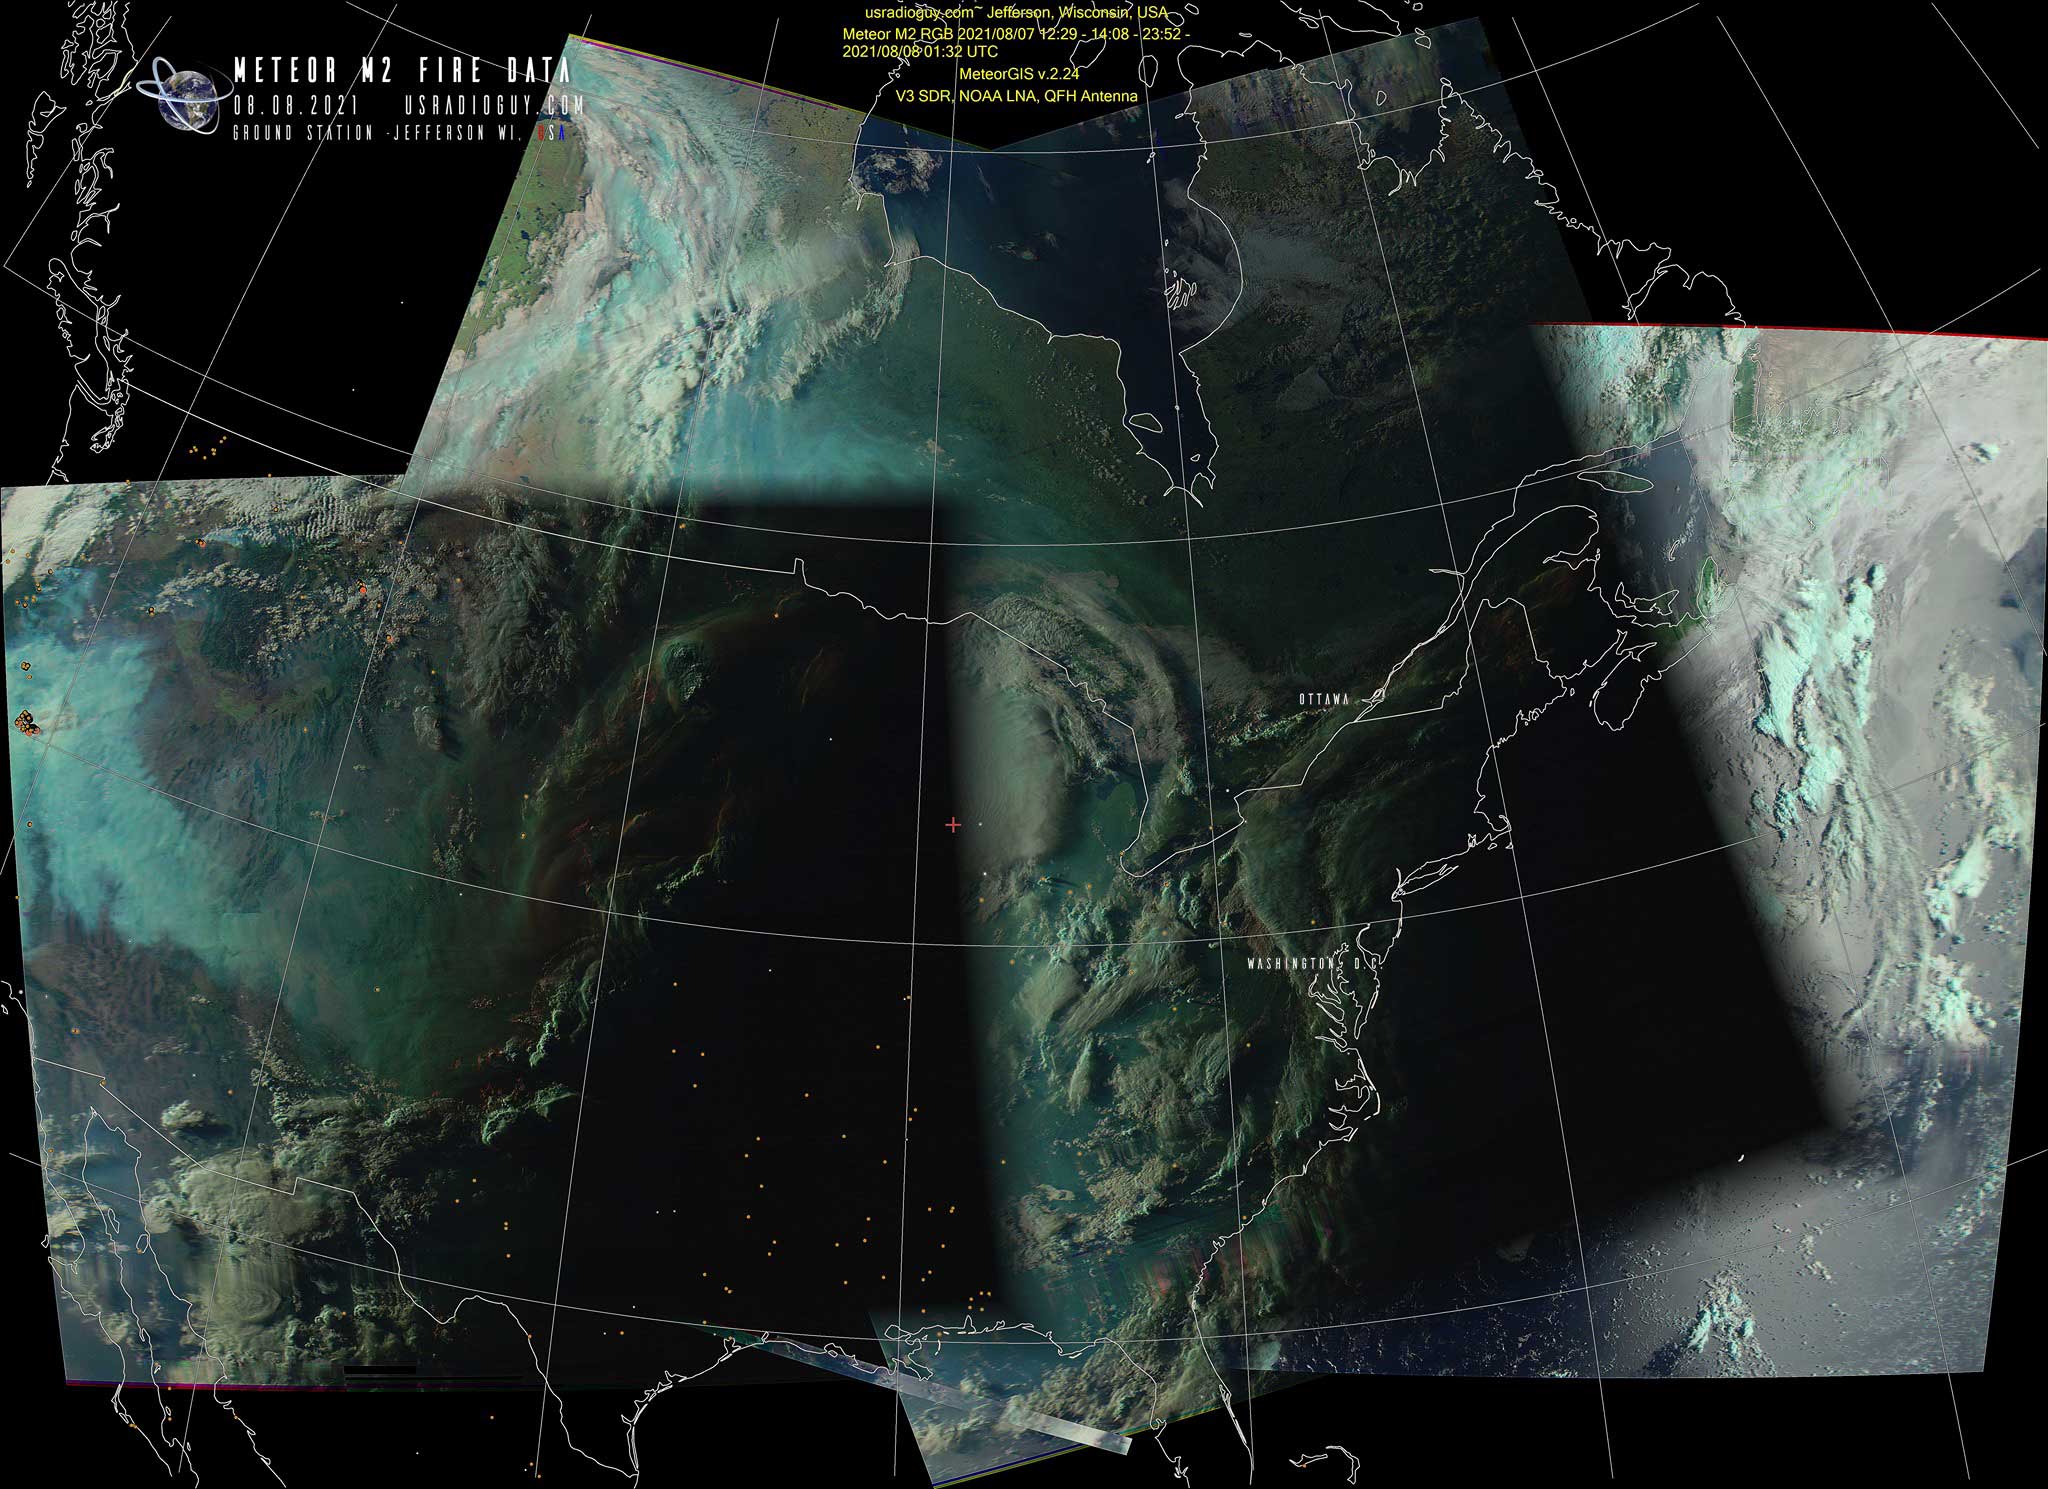
Using the built-in GIS functionality of the Software- MeteorGIS 2.24, I have added to Meteor M2 imagery, Fire hotspot data from the Terra and Aqua Satellite MODIS (Moderate Resolution Imaging Spectroradiometer). The satellites have a viewing swath width of 2,330 km and views the entire surface of the Earth every one to two days. Its detectors measure 36 spectral bands between 0.405 and 14.385 µm, and it acquires data at three spatial resolutions — 250m, 500m, and 1,000m. This data is received in White Sands New Mexico, USA and then the data is distributed from there. In this case, I use the 24 hr Global Fire Hotspot Data and apply it within MeteorGIS to mark fires based on Brightness (Fire Reflective Power). Size and intensity are marked by a graduated color from yellow to orange, to bright red, and based the size and strength of the fire.
EDIT YOUR EXISTING/WORKING MeteorGIS .ini file
MAKE A BACKUP OF YOUR EXISTING/WORKING MeteorGIS .ini file!!!!
With notepad, or better Notepad++ open your working Meteor.ini file
NOTE: there are two ways of doing the edits one removes the geography (mountains) section from the .ini, the second adds a section while retaining geography:
VERSION ONE: In the SHAPES section of the meteor.ini file:
[Shapes]
shapesNumber=5
[Shape0]
filename=ne_50m_coastline.shp
color=#F5D3A4
thickness=3
[Shape1]
filename=ne_50m_admin_0_boundary_lines_land.shp
color=#F2F896
thickness=3
[Shape2]
filename=ne_110m_graticules_10.shp
color=#f5f7fa
thickness=2
[Shape3]
filename=ne_50m_populated_places.shp
form=circle
latitudeField=LATITUDE,N,19,11
longitudeField=LONGITUDE,N,19,11
rupturesField=POP_MAX,N,9,0
ruptures=1000000,5000000,10000000
colors=#F7FAF2,#C9D3EB,#A4B4D8
sizes=6,9,12
nameField=NAMEASCII,C,100
drawName=fromfield
fromField=FEATURECLA,C,50
contain=Admin-0 capital
containType=strict
[Shape4]
filename=ne_10m_geography_regions_elevation_points.shp
form=triangle
latitudeField=lat_y,N,25,9
longitudeField=long_x,N,25,9
rupturesField=elevation,N,25,9
ruptures=1000,3000
colors=#aa8888,#552222
sizes=5,10
nameField=name,C,254
drawName=fromfield
fromField=comment,C,50
contain=highest
containType=contain
DELETE THE SHAPE 4 SECTION AND REPLACE IT WITH THIS EXACTLY:
[Shape4]
 filename=MODIS_C6_1_Global_24h.shp
 form=circle
 latitudeField=LATITUDE,N,25,9
 longitudeField=LONGITUDE,N,25,9
 rupturesField=BRIGHTNESS,N,25,9
 ruptures=325,355,400,500
 colors= #fff780,#ff6700,#B34800,#EE4B2B
 sizes=9,15,25,30
Save and exit the file.
VERSION TWO this retains the geography regions (mountains): In the SHAPES section of the file:
Change shapesNumber to 6
[Shapes]
shapesNumber=6
[Shape0]
filename=ne_50m_coastline.shp
color=#F5D3A4
thickness=3
[Shape1]
filename=ne_50m_admin_0_boundary_lines_land.shp
color=#F2F896
thickness=3
[Shape2]
filename=ne_110m_graticules_10.shp
color=#f5f7fa
thickness=2
[Shape3]
filename=ne_50m_populated_places.shp
form=circle
latitudeField=LATITUDE,N,19,11
longitudeField=LONGITUDE,N,19,11
rupturesField=POP_MAX,N,9,0
ruptures=1000000,5000000,10000000
colors=#F7FAF2,#C9D3EB,#A4B4D8
sizes=6,9,12
nameField=NAMEASCII,C,100
drawName=fromfield
fromField=FEATURECLA,C,50
contain=Admin-0 capital
containType=strict
[Shape4]
filename=ne_10m_geography_regions_elevation_points.shp
form=triangle
latitudeField=lat_y,N,25,9
longitudeField=long_x,N,25,9
rupturesField=elevation,N,25,9
ruptures=1000,3000
colors=#aa8888,#552222
sizes=5,10
nameField=name,C,254
drawName=fromfield
fromField=comment,C,50
contain=highest
containType=contain
ADD THIS SECTION DIRECTLY BELOW THE SECTION FOR SHAPE4 INFORMATION
[Shape5]
filename=MODIS_C6_1_Global_24h.shp
form=circle
latitudeField=LATITUDE,N,25,9
longitudeField=LONGITUDE,N,25,9
rupturesField=BRIGHTNESS,N,25,9
ruptures=325,355,400,500
colors= #fff780,#ff6700,#B34800,#EE4B2B
sizes=9,15,25,30
Save and exit the file.
Manual Method of Applying the Fire Data.
- Download the current global Fire/ Hotspot data from this source https://firms.modaps.eosdis.nasa.gov/data/active_fire/modis-c6.1/shapes/zips/MODIS_C6_1_Global_24h.zip
Extract the files to a temp directory. - Move ONLY the files with the extensions .DBF, .SHP,and .SHX to your MeteorGIS folder. These 2 files need to be in THE SAME LOCATION as other shape files such as ne_50m_admin_0_boundary_lines_land.dbf, ne_50m_admin_0_countries.shp, etc.
When Meteor GIS starts for the next Pass it will start processing with fire data. But, note that unless you do this daily, the fire data will not be updated. See below for automatic updating of the data.
Automating the download of new data and uploading it to the appropriate folder.
- CREATE A FOLDER ON YOUR DRIVE CALLED “C:\FIREDATA\
2. SAVE this batch file below in the c:\FIREDATA\ folder
:: Batch file to download, unzip, and update meteor fire data
:: DEPENDECIES:
:: POWERSHELL
cls
cd\
:: Create the c:\Meteor\Firedata directory if it doesn't exist.
md c:\Meteor\Firedata
:: Change Directory to working folder
cd c:\Meteor\Firedata
:: DOWNLOAD THE 24 HOUR FIRE DATA
powershell -Command Invoke-WebRequest https://firms2.modaps.eosdis.nasa.gov/data/active_fire/modis-c6.1/shapes/zips/MODIS_C6_1_Global_24h.zip -OutFile c:\Meteor\Firedata\global.zip
timeout /t 5
:: UNZIP THE ARCHIVE
powershell Expand-Archive c:\Meteor\Firedata\global.zip -DestinationPath c:\Meteor\Firedata -force

timeout /t 5

:: COPY THE .SHP,.DBF, and .SHX files to Meteor Working directory

:: *** YOU NEED TO CHANGE THE FOLDER TO YOUR WORKING METEOR FOLDER!! ***

move /y *.shx c:\Meteor
move /y *.dbf c:\Meteor
move /y *.shp c:\Meteor

:: delete the newly downloaded files
cd c:\Meteor\Firedata
del global.zip
del modis_C6*.*
@echo off
echo :
echo :
echo Getting ready to end batch file
timeout /t 5
exit
Update with MODIS FIRMS file access 09/07/2021
FIRMS has been overwhelmed with data access requests, and they have opened a mirror site to download data from, The script above has been corrected to account for the increased traffic https://firms2.modaps.eosdis.nasa.gov/data/active_fire/modis-c6.1/shapes/zips/MODIS_C6_1_Global_24h.zip
Automatic uploading of newest fire data
To schedule a daily automatic update of this batch I recommend using Windows Task Scheduler
- Open Task Scheduler in Windows
- Click Create Basic Task
- Enter name as FIREDATA DOWNLOAD
- Enter a description if you wish, click Next
- Under time, enter a time when eteor is not usually overhead for a pass, I chose 4:00:00 am
- Recur every 1 Day, click next
- Select “Start a program” click Next
- Under Program/script, browse to the place where this batch file is. it should be C:\FIREDATA\MeteorFireData.bat Click Next
- Check your settings and click finish.
- Close Task Scheduler.
Now it will automatically pull the new data from the server and upload it to the appropriate Meteor GIS folder.